
AMCS Field Worker is a companion mobile application built to Utility Cloud, focused on helping field teams find and complete their assigned work, online or offline. Available as a web app and as a downloadable iOS or Android app, it's designed with a mobile-first interface optimized for use in the field.
Accessing Field Worker
AMCS Field Worker is available as a downloadable mobile app or a web app, accessible independently or through a link in Utility Cloud itself.
You can access the web app anytime at https://ucld.us/worker/login from your browser on any device, or alternately download the mobile app in the App Store or Google Play:

To open AMCS Field Worker from Utility Cloud application, select the Field Worker icon in the navigation header. You'll be taken straight to the app without needing to sign in separately.
Signing in to Field Worker
AMCS Field Worker uses a separate login page from Utility Cloud, but you sign in with your standard Utility Cloud credentials.
To sign in:
-
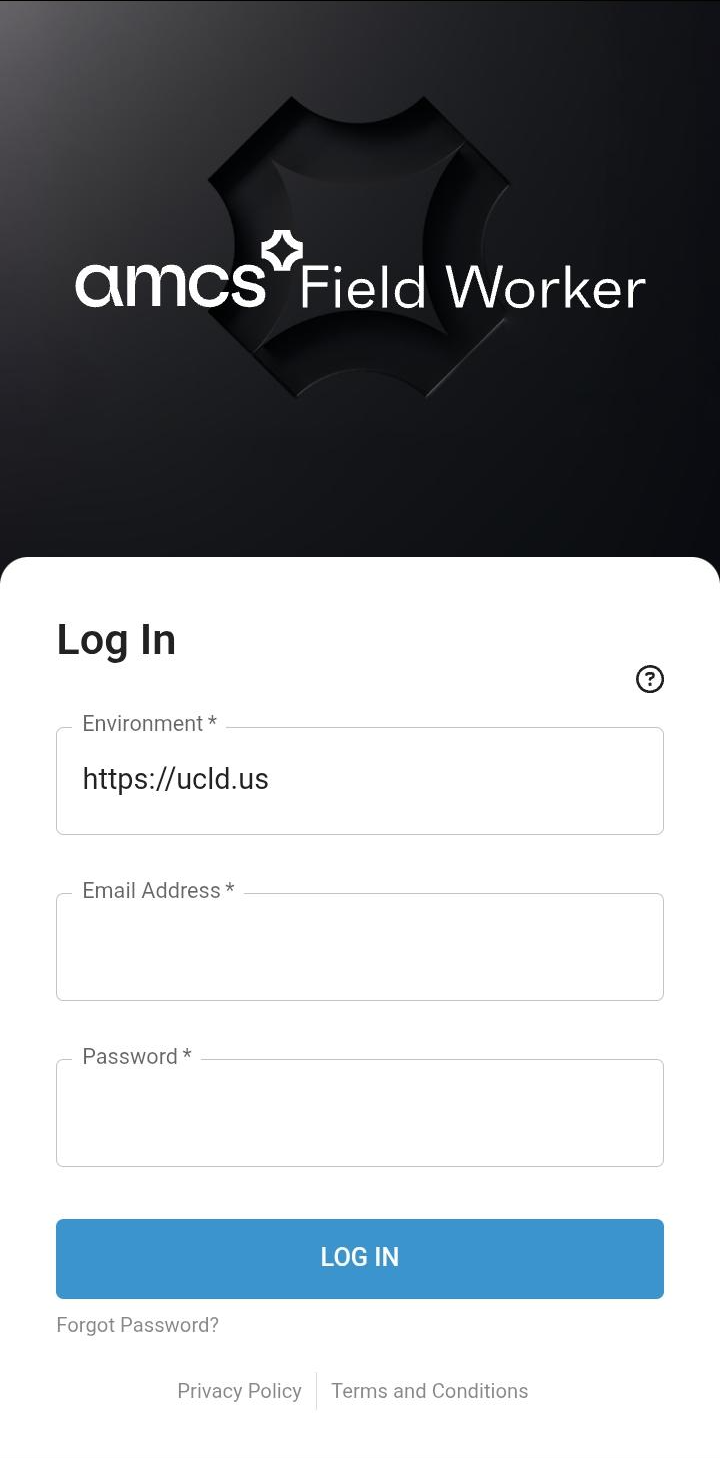
Go to https://ucld.us/worker/login, or open the AMCS Field Worker app on your mobile device.
-
If you're using the iOS or Android app and need to sign in to a specific environment, enter its base URL in the Environment box. This is intended for any users on dedicated single tenant servers, but can also be used to access our demo environment. For example, to sign in to demo, enter
demo.ucld.us. The app defaults toucld.usif no environment is entered, and your selection is saved and pre-filled on future sign-ins.
-
-
Enter your Email and Password.
-
Select Log In.
After signing in, you're taken to the My Offline Data page to download your work offline.
If your credentials aren't accepted, an error message appears below the Log In button. You can select Forgot Password? to reset your password through the core Utility Cloud application. Links to the Privacy Policy and Terms and Conditions are available at the bottom of the sign-in page.
Navigating Field Worker
Once signed in, you can access My Offline Data, My Work, or the QR Code Scanner from the navigation menu. Selecting Switch to Core App returns you to the Utility Cloud Landing Page.
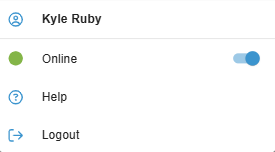
From the user profile menu in the upper-right corner of the header, you can find the help link or log out. You can also find the online/offline toggle. When set to Offline, the app behaves as if you have no connectivity, allowing you to work from saved data without waiting for automatic offline detection. A status indicator in the header shows whether you're currently online (green), toggled offline manually (gray), or truly offline (red).
Downloading work for offline use
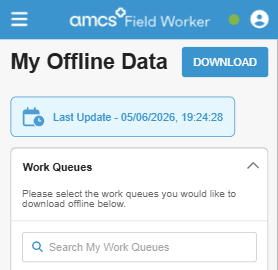
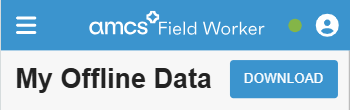
After logging in, the My Offline Data page is the first page you see. From here, you can select and download the work queues you need beginning your work. Once downloaded, the app automatically switches to offline mode if internet connectivity becomes unavailable.
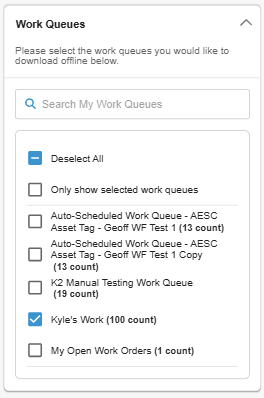
The Work Queues panel lists all work queues available to you, each shown with a checkbox and the number of work items it contains. The page also displays the date and time of your last sync and how much device storage you have remaining. All users are assigned a default work queue called My Open Work Orders, which automatically contains all open work orders assigned to you in your assigned accounts. Other work queues can be manually created and configured to include the specific work you want to find. Work queues are created and managed in the core Utility Cloud application – see Work queues for more information.
To download your work queues:
-
In the Work Queues panel, select the checkbox next to each work queue you want to download in the Work Queues panel.
-
Select Download in the upper-right corner of the page to sync the selected work queues to your device.
Once downloaded, your work will appear in the My Work page, and be available even without an internet connection. The My Work page also shows your last sync date, to indicate when your offline data might be stale and in need of a newer download.
Finding your work
AMCS Field Worker gives you two ways to find work: the My Work page, which shows all work from your downloaded work queues, and the QR Code Scanner, which lets you jump directly to an asset's work by scanning its QR code.
My Work
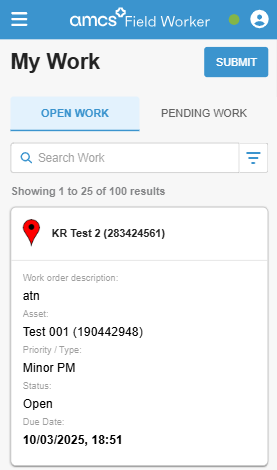
The My Work page shows all work orders and scheduled work from your downloaded work queues. It's accessible from the navigation menu at any time after signing in.
This page covers My Work in AMCS Field Worker. If you're looking for My Work in the core Utility Cloud application, see My work.
My Work has two tabs:
-
Open Work: Shows all downloaded open or in progress work orders and scheduled work available to complete.
-
Pending Work: Shows any work that has been saved to your device but not yet been submitted yet. Any work where submission failed will show with an error indicator on its card. The number of unsubmitted items shows in red on the tab.
Security Rights Required: view my work queue
Searching your work
A search bar is available on both the Open Work and Pending Work tabs. Entering text returns any work items where the workflow title, work order ID, asset description, or asset ID contains your search term. Clearing the search bar returns all results.
Security Rights Required: view my work queue
Filtering and sorting your work
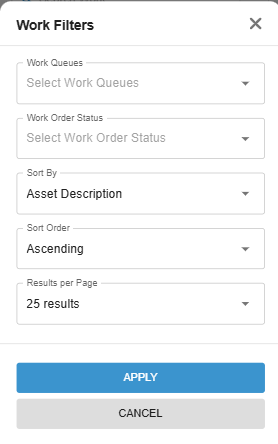
Select the filter icon next to the tabs to open the filters panel. Your filter selections persist when you reopen the panel. Selecting Cancel discards any unsaved changes.
The following filters are available:
-
Work Queues: Filter to show only work from selected work queues. If no work queues are selected, work from all downloaded queues shows.
-
Status: Filter to show only work orders of selected statuses – open or in progress. Scheduled work is not affected by this filter. If no statuses are selected, work orders and scheduled work of all statuses show.
-
Sort By: Sort results by asset description (default), asset ID, workflow, work order description, work order ID, or due date. Work orders with no due date appear first when sorting by due date ascending.
-
Sort Order: Sort results in ascending (default) or descending order.
-
Results Per Page: Show 10, 25 (default), 50, 75, or 100 results per page. Changing this returns you to page 1.
If no work queues have been downloaded yet, you will be shown a link to the My Offline Data page.
Security Rights Required: view my work queue
Submitting pending work
When you return to connectivity after working offline, select Submit in the My Work header to upload any pending work to Utility Cloud. Submitted items are removed from the Pending Work tab after a successful upload. If any reports fail to submit, they remain on the Pending Work tab and a notification appears. You can open each failed item to review the error and resubmit.
Security Rights Required: view my work queue; Can Complete Work; Can Save Draft Work Order
QR Code Scanner
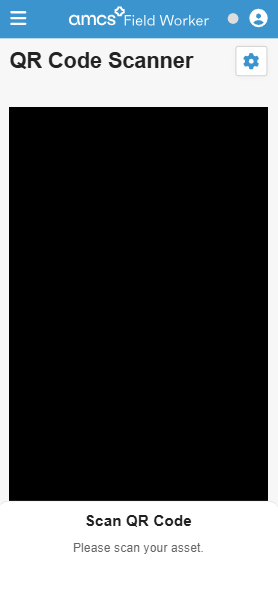
The QR Code Scanner lets you find an asset by scanning its QR code, then view its open work and asset details – without navigating through your work queues manually. The scanner works both online and offline, provided your work queues have already been downloaded, and while online, can find any asset you’d normally have access to, not just those in your queues. QR codes can be scanned from physical asset tags – pre-printed QR code tags ordered through Utility Cloud and linked to an asset – or from asset labels, which are QR code labels configured and printed from Utility Cloud linking to a specific asset. See Asset tags and the QR code scanner and Asset labels for more information on each.
To find an asset using the QR Code Scanner:
-
Select the QR Code Scanner tile from the navigation menu.
-
Point your device's camera at the asset's QR code.
-
If the asset is found: A drawer opens showing the asset's open and in-progress work items alongside its asset details.
-
If the asset is not found online: A notification appears with the message Asset not found. Please scan a valid asset.
-
If the asset is not found offline: A notification appears with the message Asset not found offline. Please scan a valid asset or go online.
-
-
In the asset drawer, select any work item to open it and complete as normal.
Security Rights Required: View Tile QR Code Scanner
Changing the camera
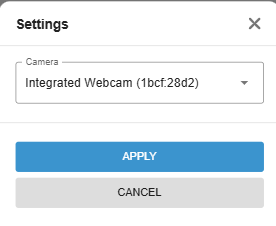
By default, the QR Code Scanner uses your device's default camera. If you need to switch cameras:
-
Select the Settings icon in the upper-right corner of the page.
-
Select your preferred camera from the Camera dropdown list.
-
Select Apply.
Security Rights Required: View Tile QR Code Scanner
Completing a work order
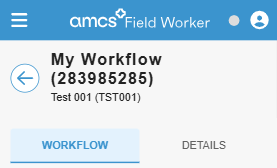
Selecting any work item from the Open Work or Pending Work tab opens the Workflow Report Editor. The header displays the workflow title – followed by the work order ID in parentheses if the work item is a work order – and the asset description and asset ID below it. For more information on work orders and scheduled work, see Work orders and Work scheduler.
The Workflow Report Editor has two tabs: Workflow and Details.
Workflow tab
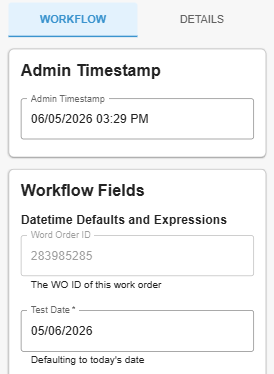
The Workflow tab contains the panels you use to complete the work item.
The Admin Timestamp contains a date field for recording the date and time of the work, defaulting to the current date and time when you open your workflow. This is only visible to users with the Edit Workflow Report Date and Time security right.
The Workflow Fields panel contains all fields configured for the workflow, and your workflow will show the same as in the core Utility Cloud Workflow Report Editor. For more information on how workflows are configured and the field types available, see Workflow classes and Asset class attributes and workflow fields.
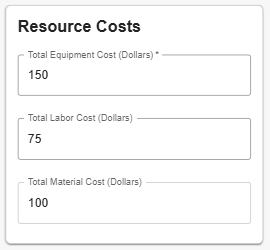
If the workflow has resource tracking enabled, a Resource Costs panel is also shown, containing the following fields with their default values set on the workflow:
-
Total Equipment Cost (Dollars)
-
Total Labor Cost (Dollars)
-
Total Material Cost (Dollars)
Security Rights Required: View Workflow Report
Details tab

The Details tab contains read-only information about the work item and related records. All panels are available in both online and offline mode. The following panels are available:
-
Work Order Details: The description, work order ID, priority, type, assignees, and due date of the work order. This is only shown for work orders, not scheduled work.
-
Account Details: The account and parent account associated with the asset.
-
Asset Details: The asset's attributes. Only visible to users with the Can View Asset Attributes security right.
-
Workflow History: The date, completed-by user, and field values from the most recent completed report of the same workflow on this asset. Draft and in-progress reports are excluded. Only visible to users with the can view work history security right.
Note: Editing assets from the Workflow Report Editor is not yet supported in AMCS Field Worker.
Security Rights Required: View Workflow Report
Saving and submitting
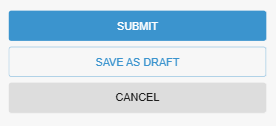
Once you’ve entered your workflow’s details, the below actions are available at the bottom of the Workflow Report Editor:
-
Submit: Submits the completed workflow report. Disabled if any required fields fail validation. After submitting, you're returned to the tab you navigated from.
-
Save as Draft: Saves the report as a draft without submitting. Only available for work orders in Open or In Progress status – not for scheduled work. Disabled if any fields fail validation, excluding required field validation. The draft appears in the Pending Work tab, and the work order moves from Open Work to Pending Work.
-
Cancel: Returns you to your previous page without saving.
Some security rights restrict which work can be submitted. If a restriction applies, Submit is disabled and an explanatory message appears on the page:
-
Can Only Perform Assigned Work: Submit is disabled on any work order you're not assigned to, and on all scheduled work.
-
Can Only Perform Workflows If Stakeholder: Submit is disabled on any scheduled work where you're not a stakeholder on its work schedule.
-
Workflows Must Be Due: Submit and Save as Draft are disabled on any work order or scheduled work that isn't currently due.
If a workflow report submission fails, an error message appears below the page header. The failed report is stored in Pending Work, and on addressing the error and resubmitting, it's removed from Pending Work automatically.
Security Rights Required: View Workflow Report; Can Complete Work; Can Save Draft Work Order
Discarding pending work
If you want to remove any unsubmitted workflow report from Pending Work without submitting it, you can discard it from the Workflow Report Editor.
To discard a pending work item:
-
From the Pending Work tab, select the work item you want to discard.
-
Select Discard.
-
In the confirmation dialog, select Okay to confirm.
The report is permanently removed from Pending Work and you're returned to your previous page. Select Cancel in the dialog to return to the editor without discarding.
Security Rights Required: View Workflow Report
Whitelabeling
AMCS Field Worker supports whitelabeling, allowing organizations to apply custom branding across the app. This includes the login page, navigation header, browser title, and favicon. For more information on configuring white labeling, see Whitelabeling.