
Key Points to Work Scheduler Tile
-
The Work Schedule is an area where the user can view, create and edit the schedules of workflows on an entire asset class.
-
This enables the user to take workflows and asset classes and create work that is due on a schedule.
Details to Work Scheduler Tile
Work can be scheduled as a one time occurrence or on a minute, hourly, daily, weekly, monthly, yearly basis.
Create a Work Schedule
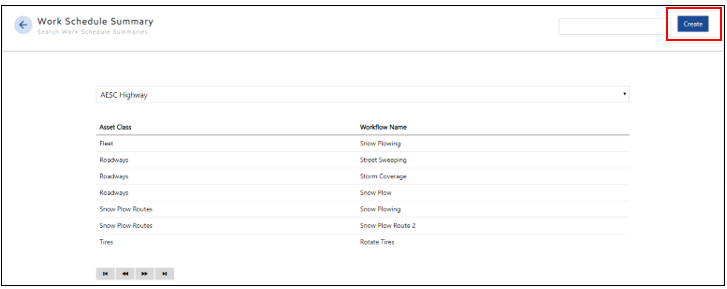
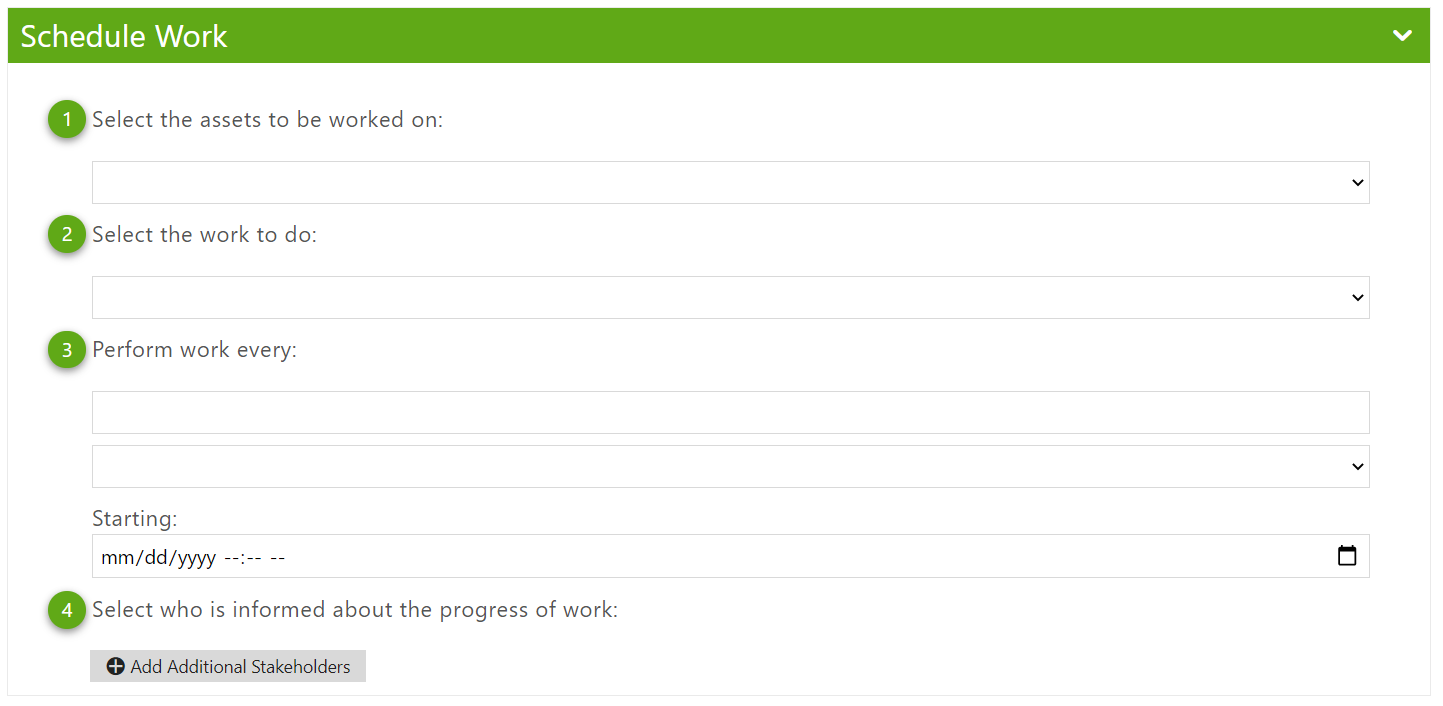
Quick Steps to Create a Schedule
-
Select the Work Scheduler tile from the Landing Page or the left navigation menu.
-
Select the desired Account.
-
Select Create.
-
Select the desired Asset Class and Workflow.
-
Select a work schedule and start date.
-
Add stakeholders if desired.
-
Select Save.
Detailed Steps to Create a Schedule
-
Select the assets to be worked on: select one asset class for the work to be assigned to; all assets in this class will receive the same schedule for the work.
-
Select the work to do: select a single workflow.
-
Perform Work Every: select a numerical value into the first section and select a repeat period in the second. (minutes, hours, days, etc.) The user can also choose to create the schedule as a single event. The user must input a starting date and time as well.
-
Select who is informed about the progress of work: add a stakeholder to the schedule.
Security Rights Required: View Work Scheduler
Edit a Work Schedule
Quick Steps to Edit a Schedule
-
Select the Work Scheduler tile from the Landing Page or from the left navigation bar.
-
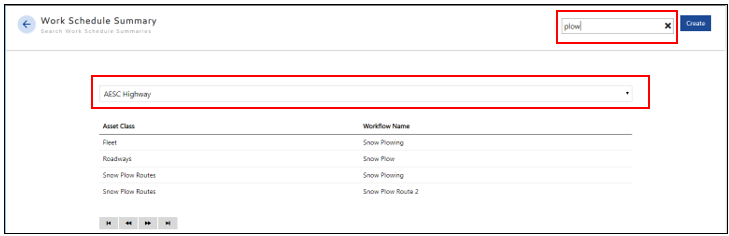
Select the account which contains the desired schedule.
-
The Search can be further refined by typing the name of the Asset Class or Workflow into the search bar.
-
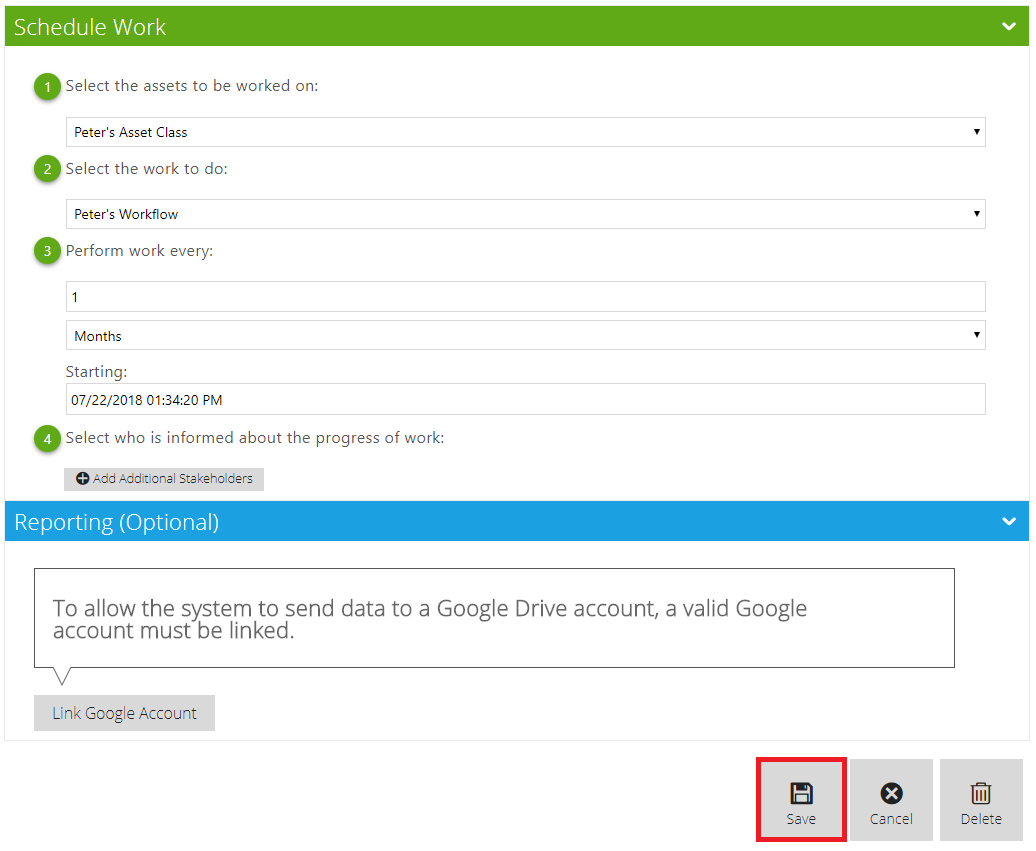
Select the desired Schedule will bring the user to the Work Schedule Editor.
-
Changes can be made to the Assets, Work, Schedule and Stakeholders.
-
Select Save.
Security Rights Required: View Work Scheduler
Related articles