
Key Points to Sequences
Sequences are used to restrict the order of work performed on a set of asset/workflow pairs such as Hydrants and Hydrant Flushing. Hydrant Flushing is commonly performed in a particular order and is typically broken down into zones.
A Sequence consists of multiple Steps. Each Step consists of one or more Asset/Workflow pairs. The work within the Step must be performed in order. The Steps within a Sequence must be performed in order.
Creating Sequences
-
Create a Sequence Type Asset Class (See Asset classes for more information).
-
Create a Sequence Type Workflow (See Workflows for more information).
-
Create the Sequence.
-
Add Steps to the Sequence.
-
Add asset/workflow pairs to the Sequence Step.
-
View the Sequence on the Map.
Create the Sequence
-
Select the Sequences tile on the Landing Page.
-
Select the Account where the Sequence should be created.
-
Select Create.
-
Provide a Title for the Sequence.
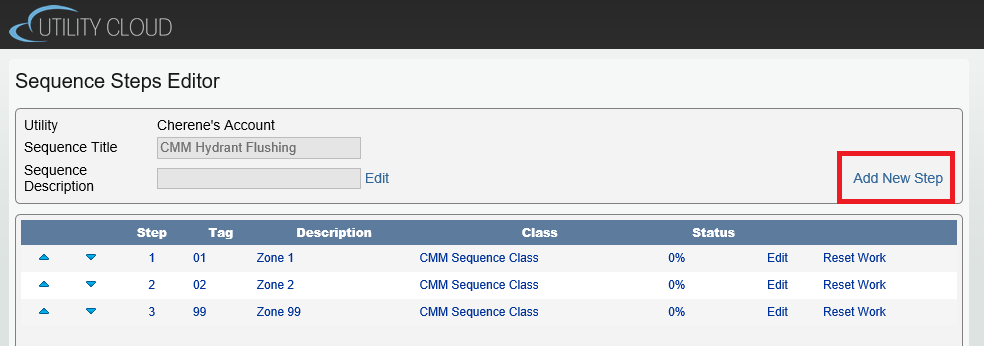
Add Steps to the Sequence
-
Select Add New Step.
-
Select the Sequence Asset Class created.
-
Identify the Step Description (i.e. "Zone 1", "Zone 2", etc.).
-
Identify the Step Tag (i.e. "01", "02", etc.).
-
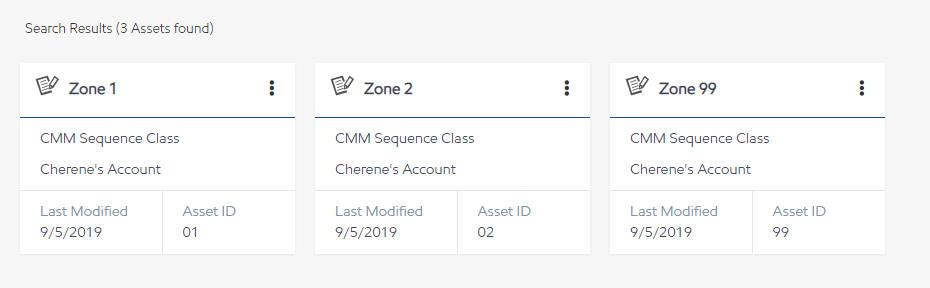
Creating a Step will automatically create an asset in the Sequence Asset Class using the Step Tag as the asset ID and Step Description as the asset description.
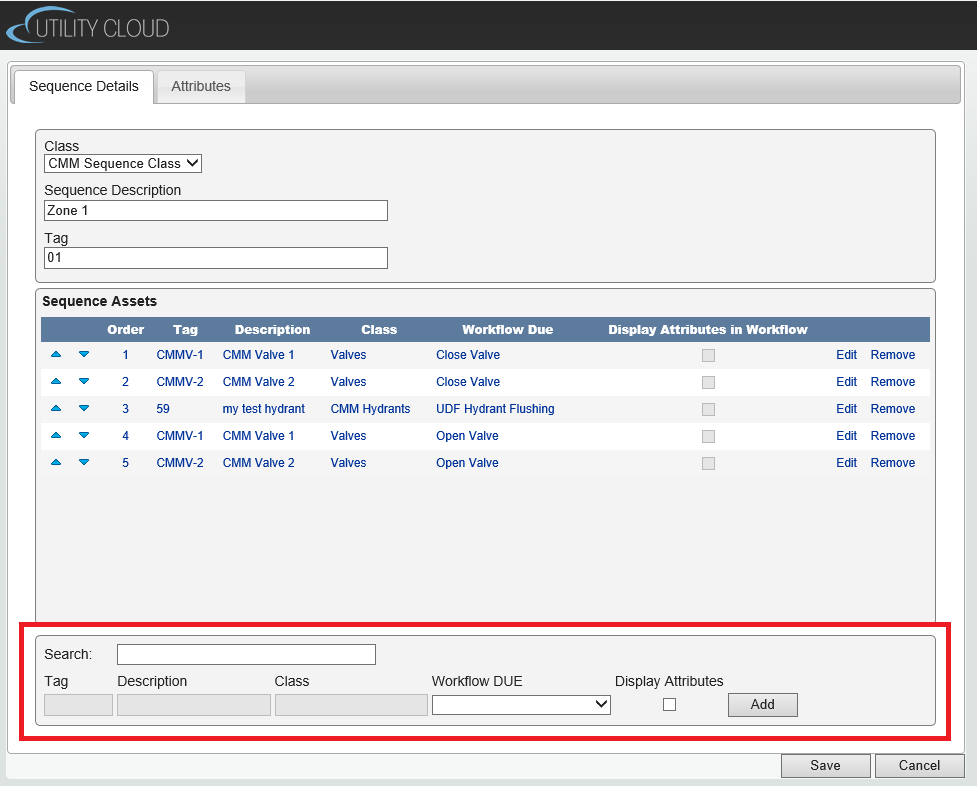
Add Assets and Workflows to the Sequence Step
-
For each asset to be included in this Step, search for the asset by entering a portion of the asset description in the Search field.
-
Select the asset. The Tag (Asset ID), Description, and Class will display in the appropriate fields for the selected asset.
-
Select the workflow to be performed on the selected asset.
-
Display Attributes in Workflow - If during the execution of this step you need the Sequence Attribute data to display to the user select the Display Attributes in Workflow option. This adds a section (Sequence Attributes) to the work order being completed that displays the data entered on the Attributes tab of the Sequence.
-
Select Add.
-
Select Save once all asset/workflow pairs have been added.
Setting up Sequences using Microsoft Excel
Manually adding all the steps and asset/workflow pairs can be time-consuming. Setting up the Sequences in Microsoft Excel and Importing them into Utility Cloud is a quicker approach.
Select Export Blank to download a template worksheet that provides examples of how to fill the worksheet.
Select Export All to export a spreadsheet with all of the Sequences within the Account.
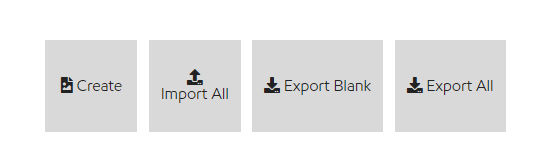
Once all edits have been made to the worksheet, select Import All to add them to Utility Cloud.
Related articles