
Users represent any individual or system that uses Utility Cloud. Your user is what you use to sign in to Utility Cloud and do whatever you need to, from completing work to seeing all of your assets and their history.
Every user is associated with a unique email address and requires at least one account and security role. What you can do in Utility Cloud is determined by your assigned accounts and security rights, and to a lesser extent your role exceptions and stakeholder roles. You can customize your own user and others' in any number of ways – from full billing account administrator access down to view-only access in a single account.
Searching for users
You can search for any users that share an account with you from the User Search page, found by selecting the Users tile from the Landing Page or the navigation menu. By default, your most recently performed search displays on the page set to card view. To switch to list view, select List View, and to switch back to card view, select Card View. Selecting any user's card in card view or row in list view will take you to that user's User Details.
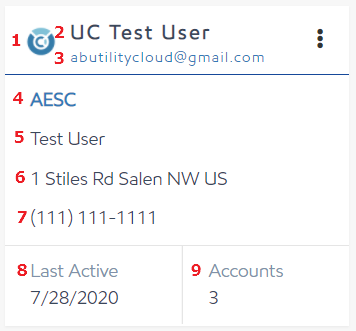
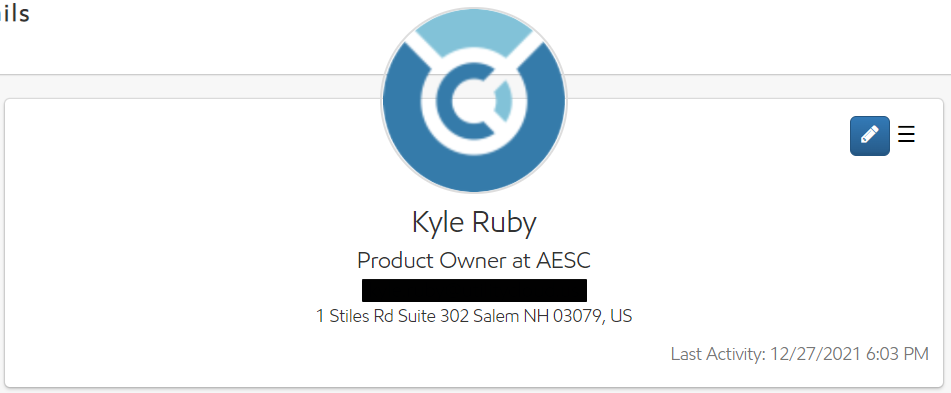
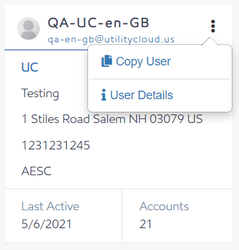
In card view, search results show as a card with the following information displayed:
-
User Photo
-
Full name
-
Email address
-
Company
-
Job Title
-
Address
-
Phone Number
-
Last Active Date
-
Total Accounts
In the list view, most of the same fields show in a list with filterable and sortable headers. You can sort by selecting the column header title and filter by entering a filter value in the text box. You can also show or hide columns by selecting which columns you'd like to see in the Show/Hide Columns dropdown list.
Security Rights Required: View Users
Quick search
You can quickly find the users you're looking for through the quick search. To find a user through the quick search:
-
Select the Users tile from the Landing Page or from the navigation menu.
-
Select an account from the account dropdown list.
-
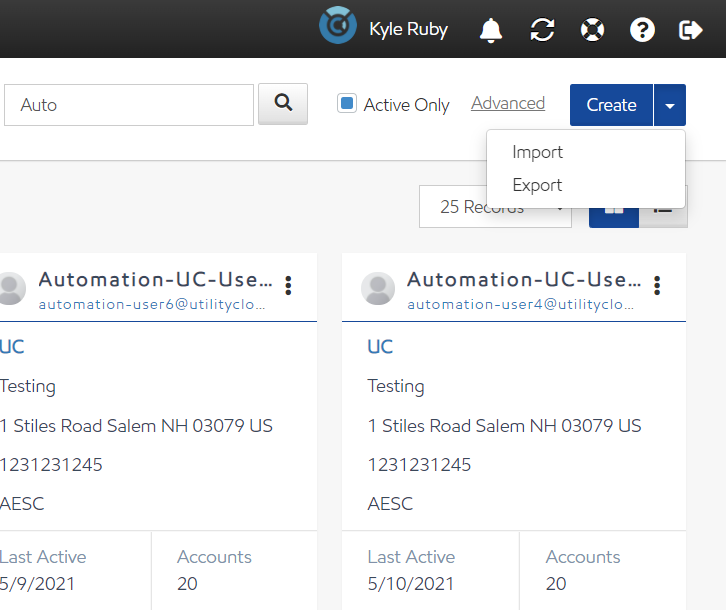
Enter your criteria in the search bar, then select Search.
A quick search returns all users where your criteria matches the name, email, company, title, address, or phone number. By default, only active users are returned, but you can also return inactive users by clearing Active Only.
Security Rights Required: View Users
Advanced search
You can be much more precise in which users are returned through an advanced search. To find a user through the advanced search:
-
Select the Users tile from the Landing Page or from the navigation menu.
-
Select Advanced.
-
In the Advanced Search panel, select any facet.
-
Where applicable, select an operator for that facet (such as equals or contains).
-
Where applicable, enter your criteria after the operator.
-
-
If necessary, select Add Rule to add a new rule to your search or Add Group to add a group of rules. By default, rules are set to AND. If necessary, select OR to change the conditions.
-
If you've added a group or rule you don't need, select Delete to remove it.
-
After your criteria is complete, select Search.
Advanced search returns all exact matches based on the criteria you entered for each facet.
Security Rights Required: View Users
Exporting users
You can export any search results to an .xlsx file from Utility Cloud. To export users:
-
Perform any search in the User Search.
-
In the upper-right dropdown list of the User Search, select Export and confirm.
-
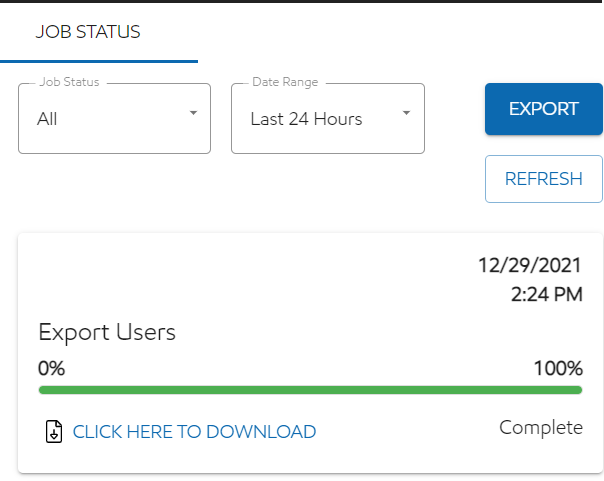
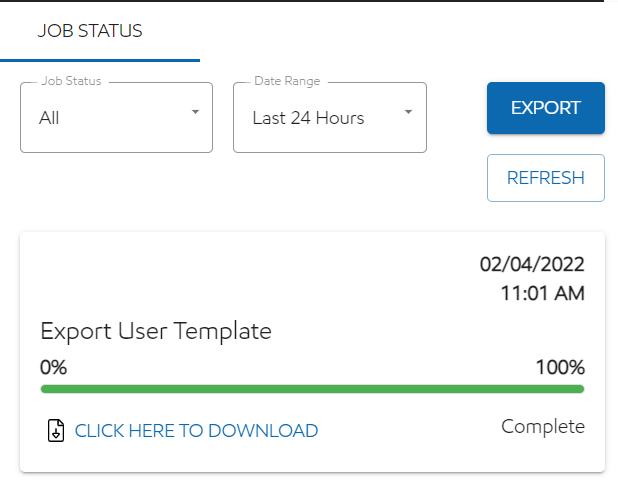
After your export is completed, you'll be notified either from the job processing panel or by email.
-
Job processing:
-
Select Complete bell icon once your job has been completed.
-
If it isn't already, set Job Status to Complete.
-
On the job card, select Click Here To Download.
-
-
Email:
-
In your inbox, search for an email from postmaster@utilitycloud.us with the subject "User Export Complete".
-
Follow the link to download your export.
-
-
Security Rights Required: View Users; Export User's Search Results
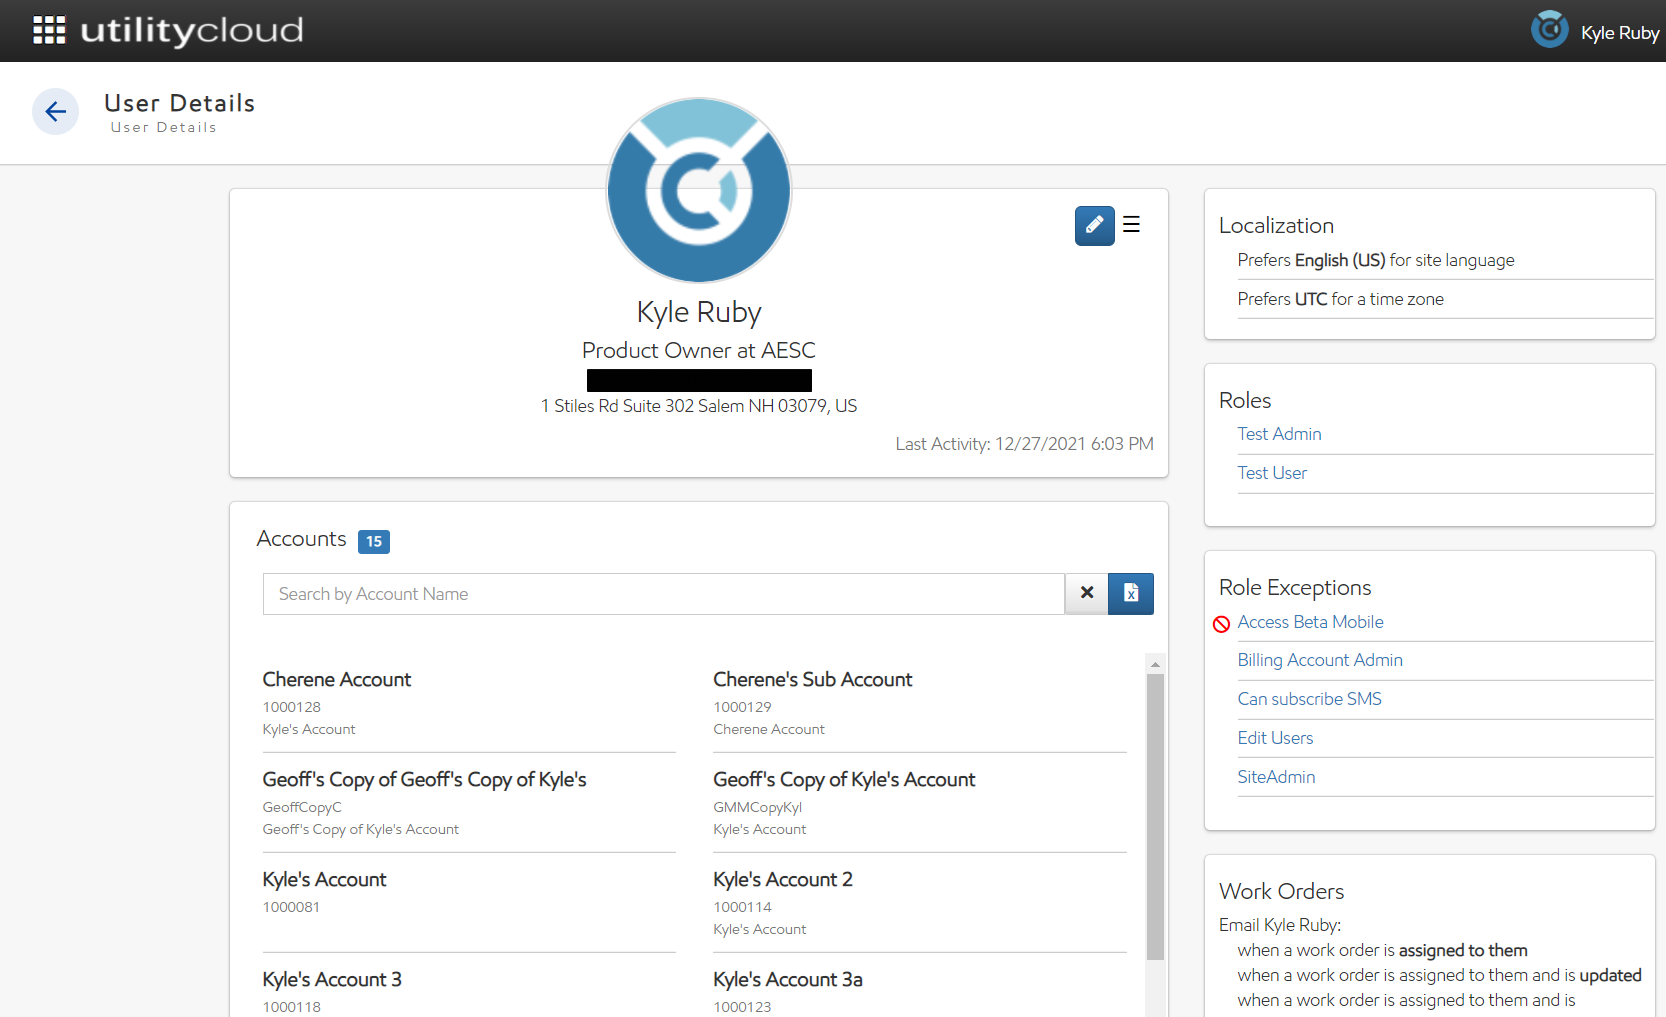
Viewing user details
All details on your user or other users are visible on the User Details page. While any user you have access to can be found through the User Search page, you can access your own User Details anywhere through the navigation menu.

You can view any user's details so long as you have the appropriate security rights and share an account in common with that user. From a user's User Details, you can view their general and contact information, assigned accounts, roles and exceptions, and other preferences. Depending on your security rights, you can also edit all of this information.
You can also view and manage a user's status. For more information, see Managing user access.
Two additional restrictions apply based on your security roles and rights:
-
Billing Account Admin: If a user has the Billing Account Admin security right, only other users with that right can view their User Details.
-
Restriction Level: You can only view other users whose restriction level is equal to or lower than your own. For more information, see Restriction Levels.
Security Rights Required: View Users
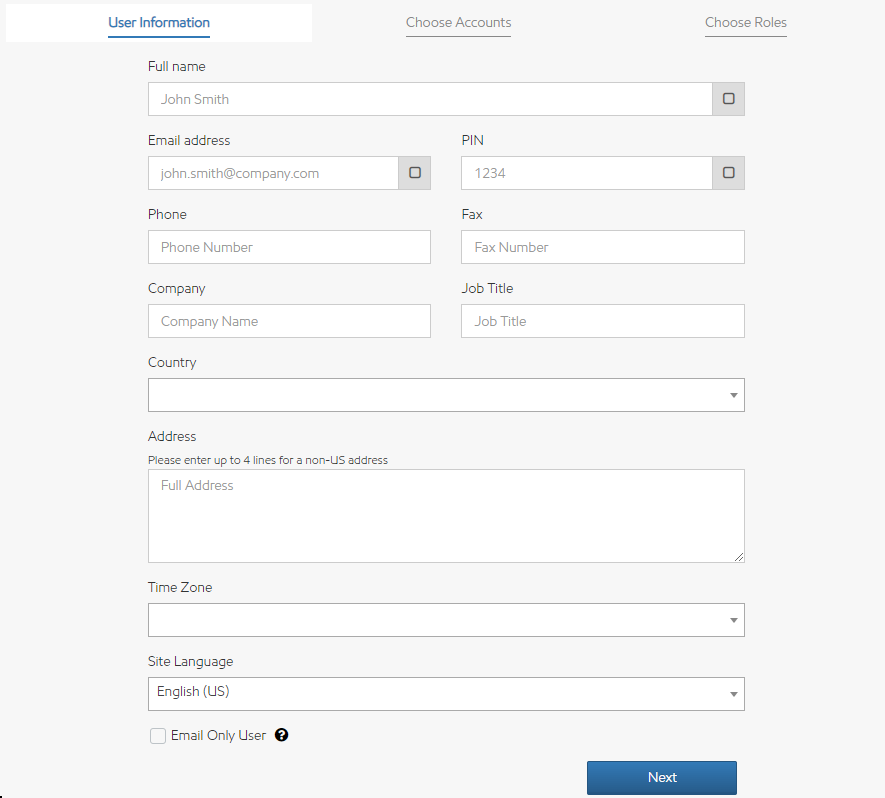
User information
The User Information panel contains basic and contact information that is viewable by most other users.
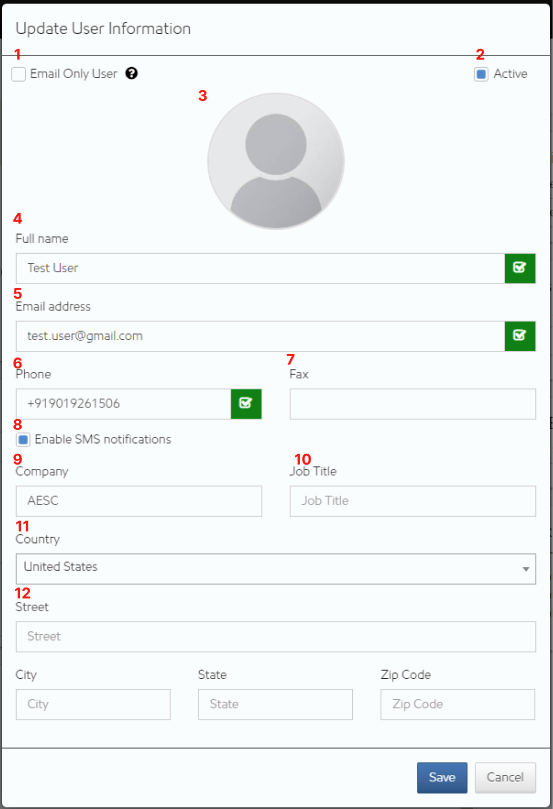
You can edit your user's basic information by selecting Edit in the upper-right corner of the User Information panel. Every user has the following attributes available to edit:
-
Email Only User: Any user configured as email only will receive emailed reports from Utility Cloud without ever needing to sign in. They won't be given credentials on user creation and must be managed by another user.
-
Active: Any user that can sign in to and use Utility Cloud. Users that no longer need access should be set to inactive.
-
User Photo: A profile image for your user.
-
Full name: How your user appears in Utility Cloud to other users.
-
Email address: The email address your user is associated with throughout Utility Cloud. An email address is required and must be unique. This is how a user signs in and receives reports.
-
Phone: A phone number associated with your user so that other users can contact you outside of Utility Cloud.
-
Fax: A fax number associated with your user so that other users can contact you outside of Utility Cloud.
-
Enable SMS Notifications: Any user can be opted into SMS notifications by an administrator with the Can Subscribe SMS security right. For more information, see Enabling SMS notifications.
-
Company: The company or organization your user is associated with.
-
Job Title: Your job title.
-
Country: The country you're located in.
-
Address: Your address. If your country is the United States, this is broken down into Street, City, State, and ZIP Code. Otherwise, it shows as a single Address box.
Of the above, Full name, Email address, and Country are required.
If you're editing a user's email address, that user will become unverified and will have to verify the new email address. Until then, their previous email address can't be reused. For more information, see Verifying your user.
Any user can edit their own information on the User Details page if they have the right to view users. To edit another user's information, you need the Edit Users security right.
Security Rights Required: View Users; Edit Users
Enabling SMS notifications
Any user with a valid phone number can be set up for SMS notifications by an administrator by selecting the Enable SMS Notifications checkbox. After it's enabled, an opt-in SMS message will be sent to the configured phone number. That user must follow the instructions in the SMS message to be opted into receiving SMS messages. If the user chooses to opt out or the number isn't reachable, they won't be opted into SMS notifications.
Currently, only work order notifications are available via SMS. For more information, see Work orders.
Users who have opted out of SMS notifications can be re-enabled only once within 30 days. If that user opts out a second time, they won't be sent the opt-in message again if you try to re-enable SMS notifications for them.
Security Rights Required: View Users; Edit Users; Can Subscribe SMS
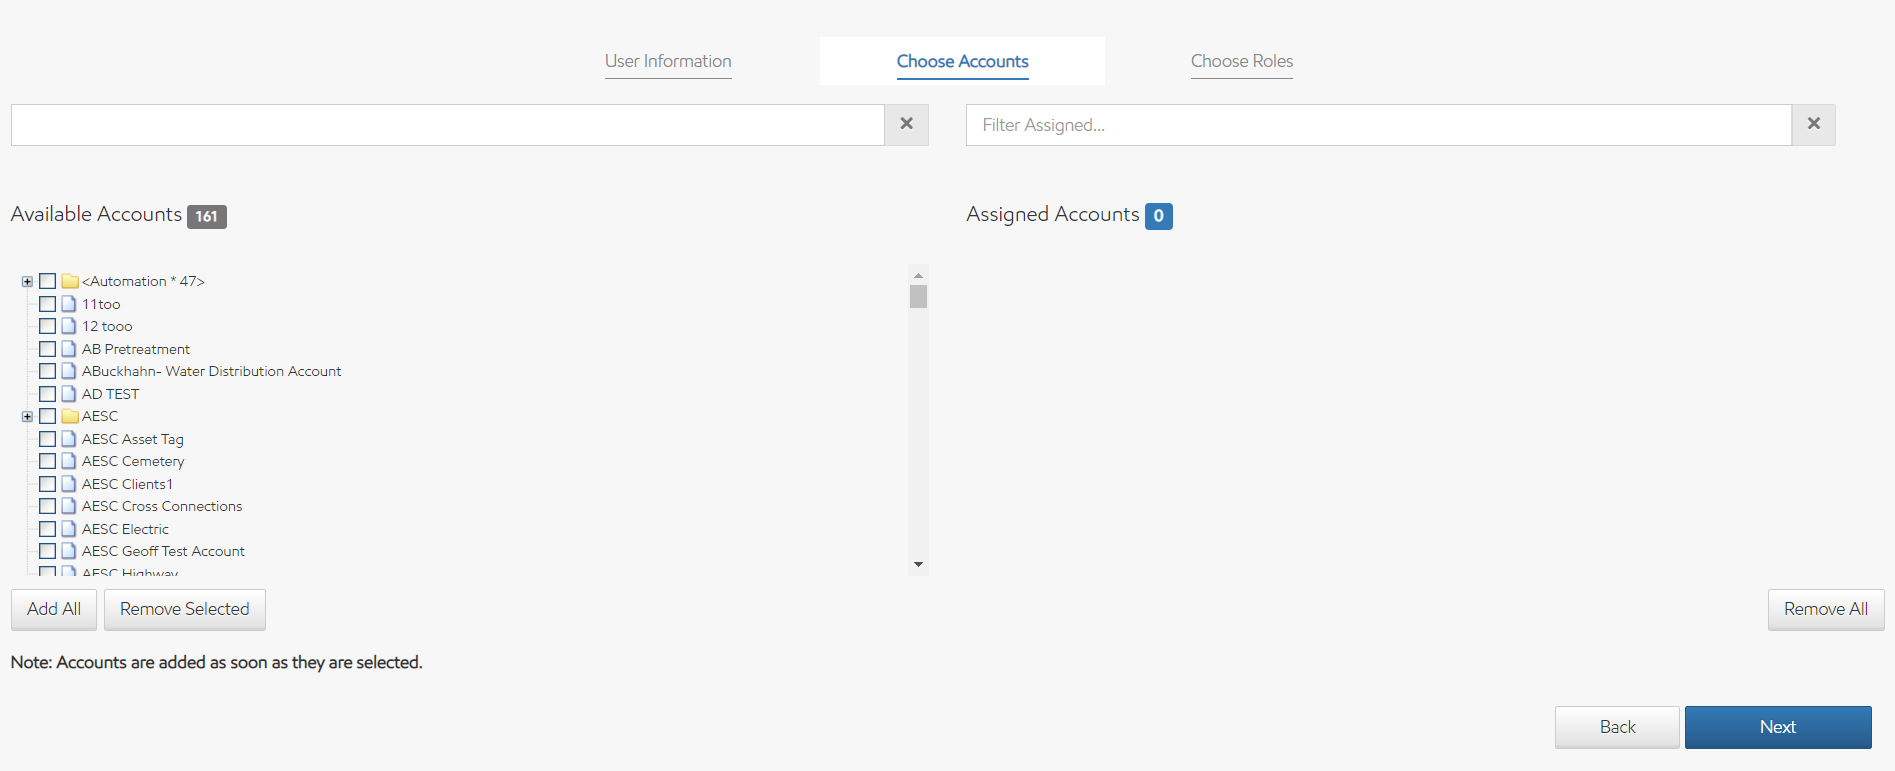
Accounts
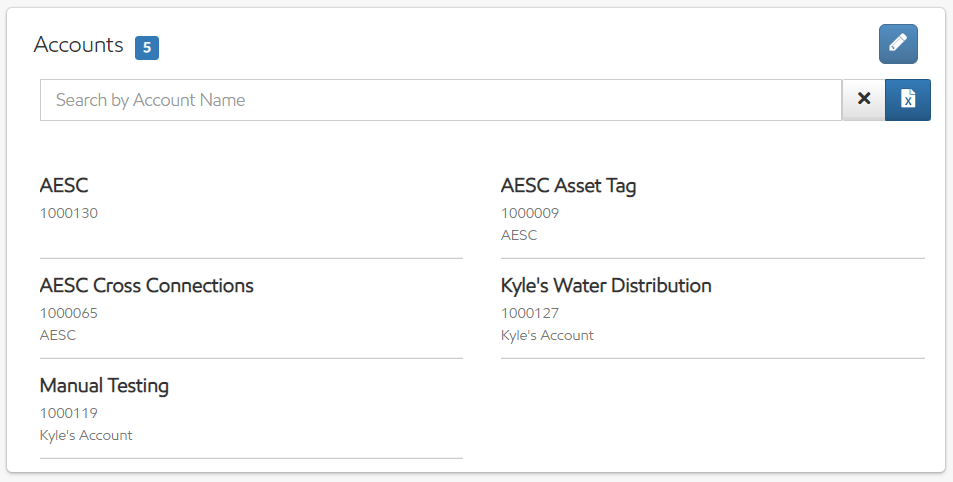
The Accounts panel contains all accounts assigned to your user. This determines which accounts – and by association, assets, users, and work orders – they can see in Utility Cloud. Unless you have the Billing Account Admin security right, you can only see accounts your user is specifically assigned.
You can edit your user's accounts by selecting Edit in the upper-right corner of the Accounts panel.
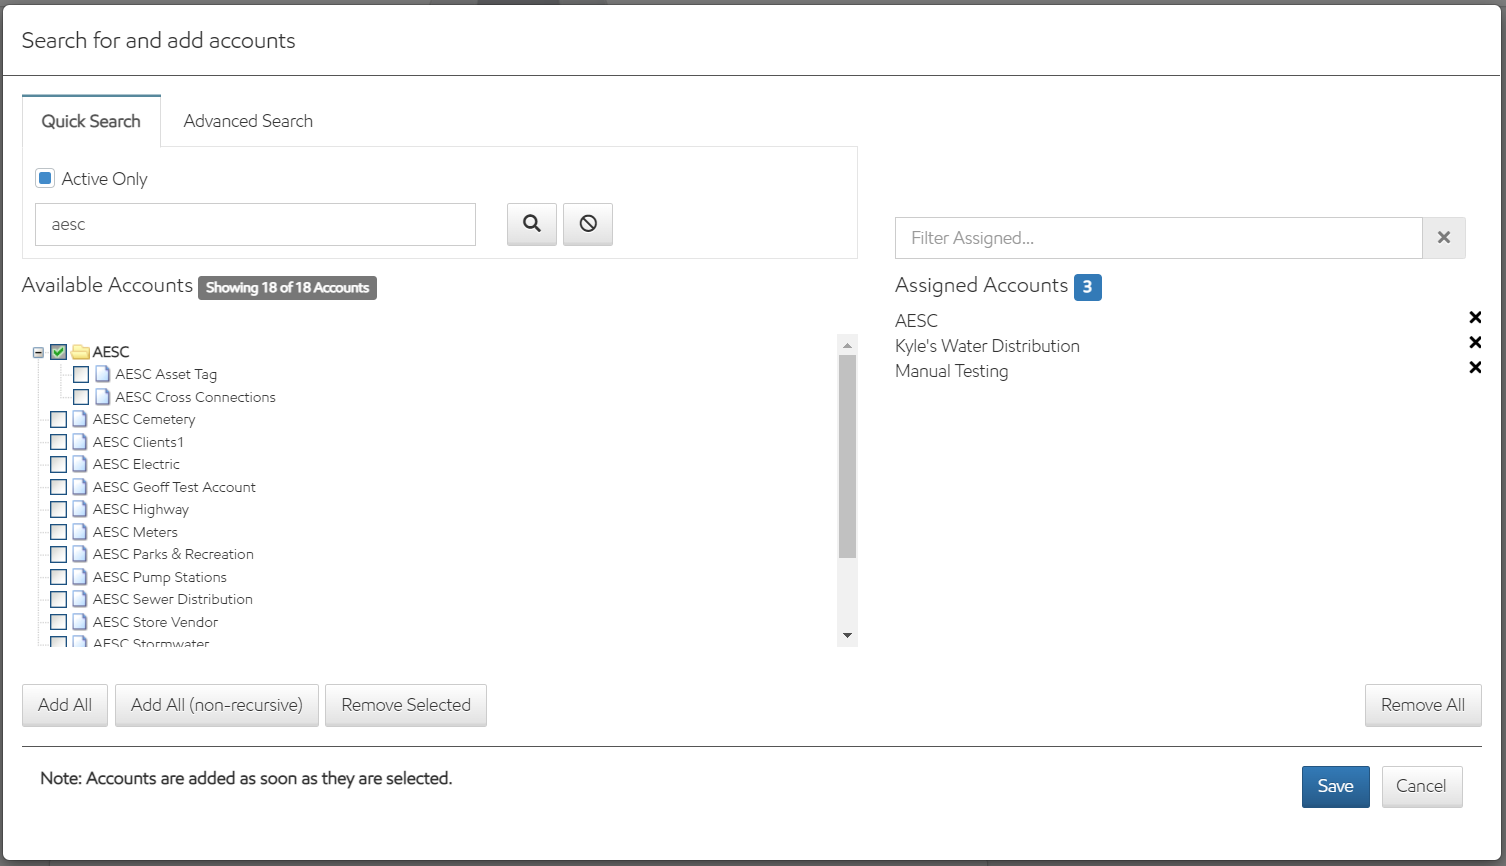
While editing your accounts, you can search by using either the quick search or advanced search, the same as on the Account Search page. Your results display based on your own assigned accounts. Parent and Child accounts show in your results, and selecting Plus next to a parent account expands your results to include all of that parent account's children.
Selecting any result under Available Accounts adds it to your Assigned Accounts. If that account is a parent account, selecting it once adds it and all children accounts; selecting it twice adds just the parent account; and selecting it a third time deselects it. You can also:
-
Select Add All to add all accounts in your results, including any child accounts not currently shown in results.
-
Select Add All (Non-Recursive) to add all accounts in your results, not including their children.
-
Select Remove Selected to remove all accounts in your current results.
-
Select Remove All under Assigned Accounts to remove all currently assigned accounts.
All users are required to have at least one account assigned to them.
Security Rights Required: View Users; Edit Users; Edit User Accounts
Localization
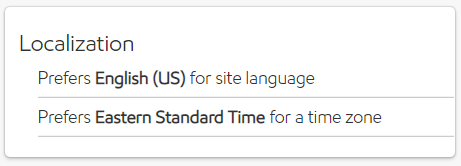
The Localization panel contains your user's language and time zone settings.
You can edit your user's language or time zone by selecting Edit in the upper-right corner of the Localization panel.
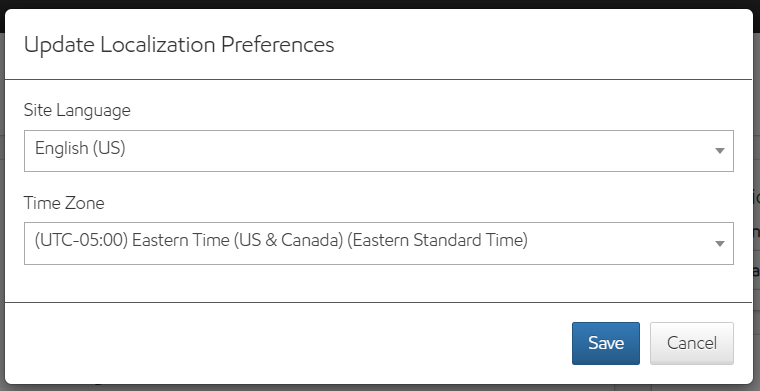
Security Rights Required: View Users; Edit Users; Edit User Preferences
Roles
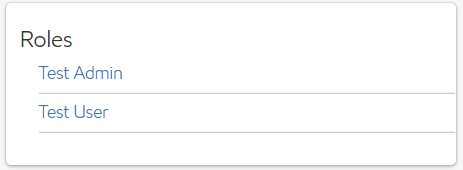
The Roles panel includes all of your user's security roles. For more information on security roles, see Security Roles.
You can edit your user's security roles by selecting Edit in the upper-right corner of the Roles panel.
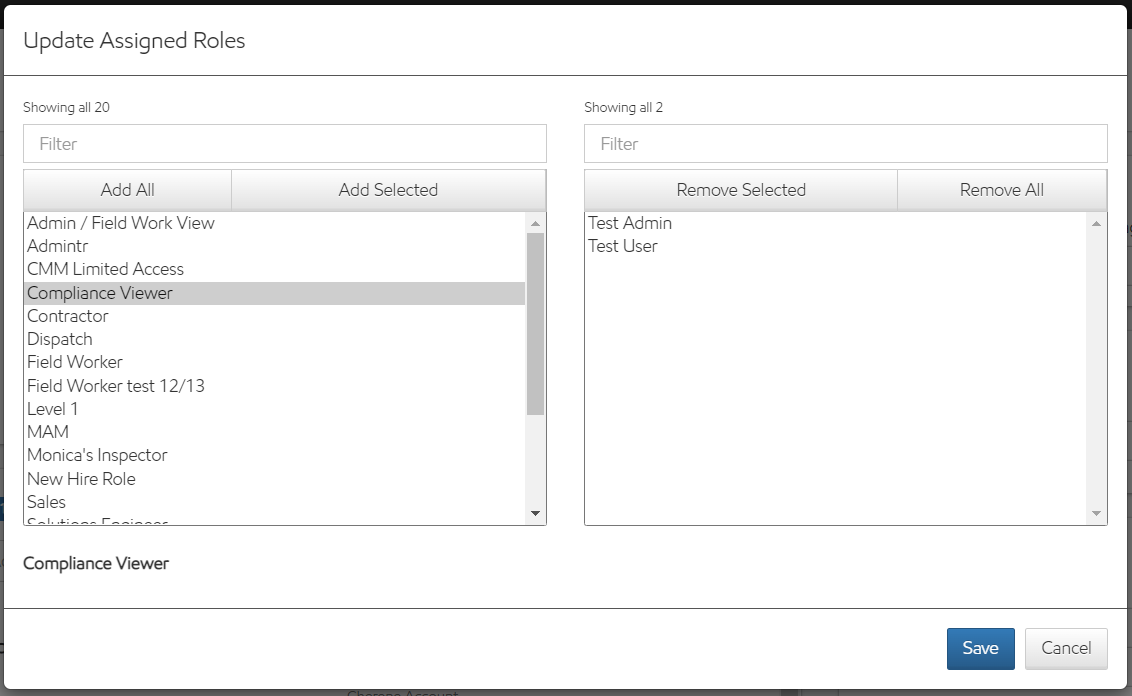
Two additional restrictions apply based on your security roles and rights:
-
Restriction Level: Unless your user's restriction level is 0, you can only view roles you're already assigned and only assign roles to a user if they're of a lower restriction level than your own. For more information, see Restriction Levels.
-
Access Admin Only: If you have the Access Admin Only security right, you can view all security roles when editing another user's security roles regardless of restriction level, but you can't edit your own. You can still only assign roles to a user if they're of a lower restriction level than your own.
Security Rights Required: View Users; Edit Users; Edit User Security Profile
Role exceptions
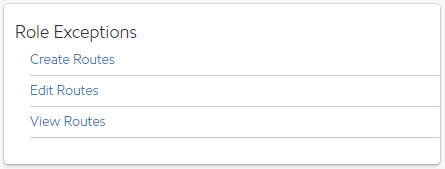
The Role Exceptions panel includes all of your user's role exceptions. Role exceptions are either additional security rights added to a user beyond those in their assigned security roles, or rights that have been specifically removed.
You can edit your user's role exceptions by selecting Edit in the upper-right corner of the Role Exceptions panel. If you add a right, it will be available to your user even if it isn't in their security role. After adding a right, you can select it and then clear Has Right to revoke it from a user – so that even if that right is available in their roles, they won't have access to it.
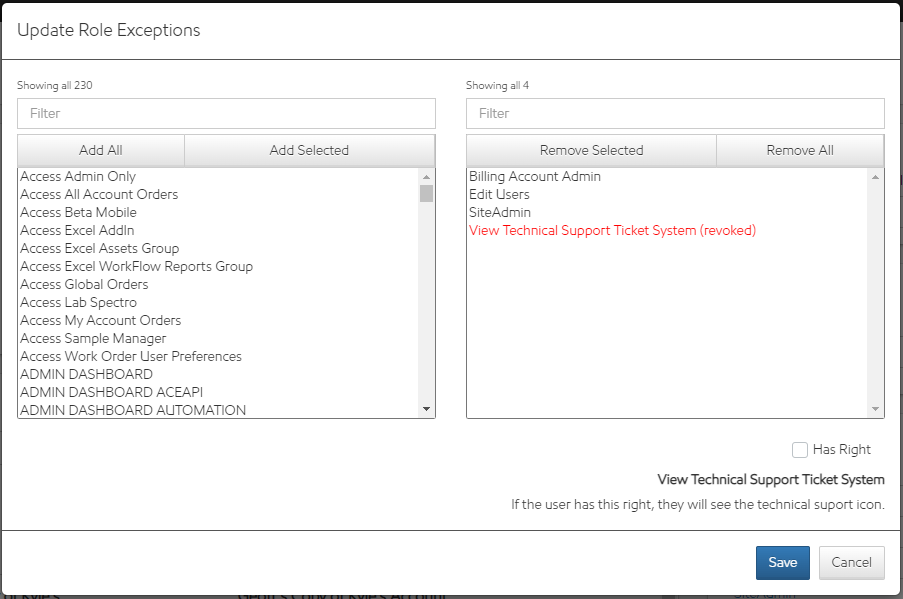
Be careful when adding security rights, especially adding all rights. Some security rights restrict access instead of adding it. In particular, adding the Access Admin Only right to your user will prevent you from editing your own role exceptions.
Security Rights Required: View Users; Edit Users; Can Assign Role Exceptions
Work orders
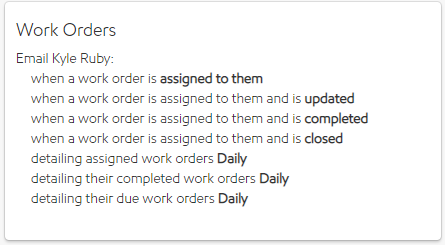
The Work Orders panel includes all of your user's preferences for receiving notifications for work orders they've created or where they're an assignee. You can receive either immediate notifications or scheduled summaries.
You can edit your user's work order preferences by selecting Edit in the upper-right corner of the Work Orders panel.
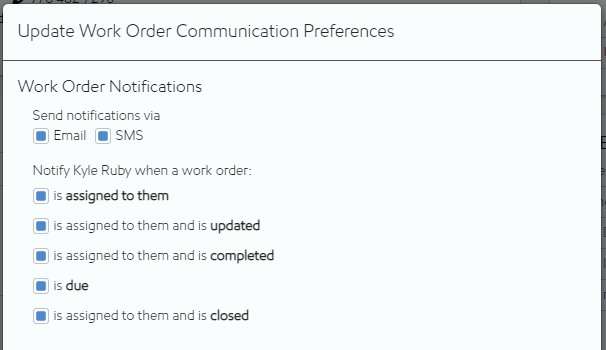
You can receive immediate notifications for when a work order is assigned to you, its details are edited, it's completed, it's due, or it's closed. These can be sent via email, SMS message, or both. Before you can receive work order notifications as SMS messages, you need to have already enabled SMS notifications and opted in with a valid phone number. Bulk updates to work orders in a route aren't included in immediate notifications.
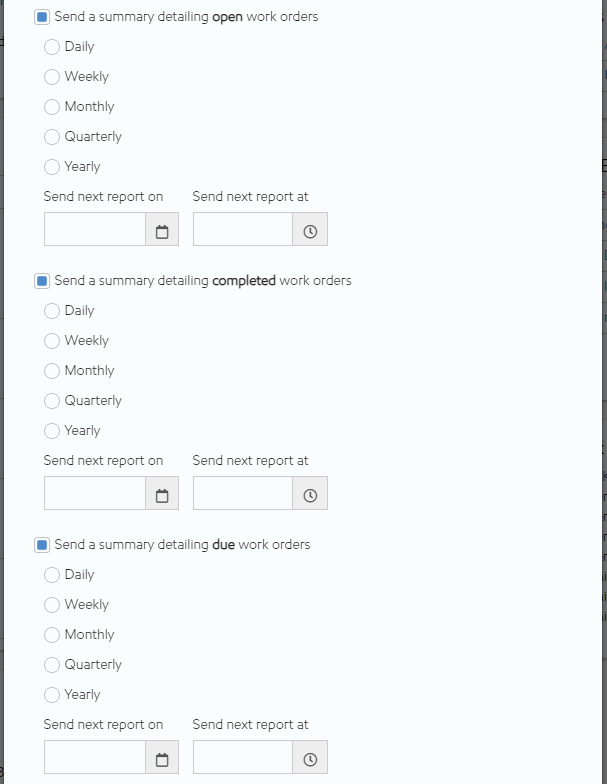
You can receive scheduled summaries of all your open work orders, completed work orders needing to be closed, and past-due work orders. For each of these, you can receive an email daily, weekly, monthly, quarterly, or yearly, and set the next date and time you'd like to receive it. After an email is sent, the next scheduled date is automatically set.
Security Rights Required: View Users; Edit Users; Access Work Order User Preferences; Can Subscribe SMS
History
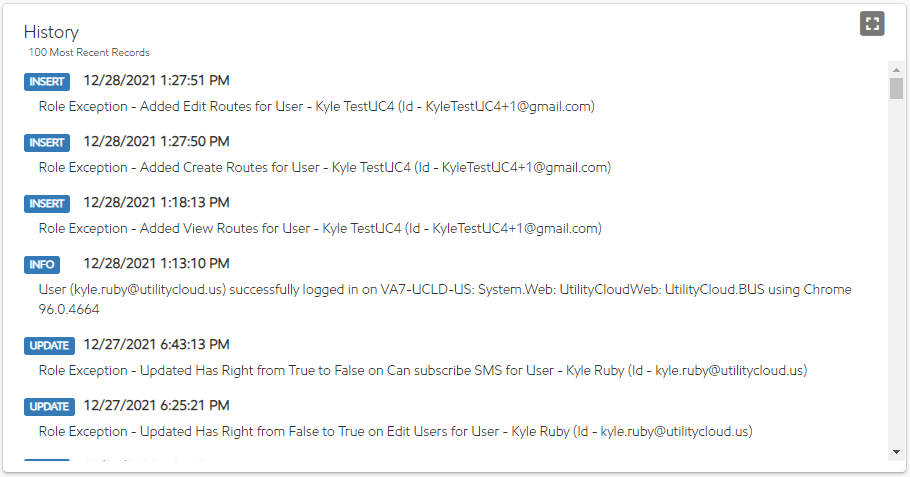
The History panel contains all audits of either actions your user performed or changes made to your user. The History panel only shows the most recent 100 audits, but you can find all audits ever made against your user on the Audit Trail page.
Security Rights Required: View Users
Creating users

You can create a new user in Utility Cloud at any time from the User Search. To create a user:
-
Select the Users tile from the Landing Page or from the navigation menu.
-
Select Create in the upper-right corner of the page.
-
Enter the required fields in the User Information tab, then select Next. Required fields include Full name, Email address, Country, Time Zone, and Site Language. You can find more information on all fields in the User information and Localization sections.
-
Select at least one account in the Choose Accounts tab, then select Next. You can find more information on adding and removing accounts in the Accounts section.
-
Select at least one security role, then select Submit. You can find more information on adding and removing security roles in the Roles section.
After your new user has been created, you'll be returned to the User Search and a welcome email will be sent to the new user's email address.
New users will be deactivated and locked out if they haven't signed in within 30 days of being created. You'll be warned at 15 days after creating the user if they still haven't signed in.
Security Rights Required: View Users; Create Users
Copying users
If you'd like to quickly create a new user with the same accounts and roles as another user, you can copy an existing user instead. To copy a user:
-
From the User Search or User Details, select Copy User.
-
In the User Search, select Copy User from the user card of the user you want to copy in the search results.
-
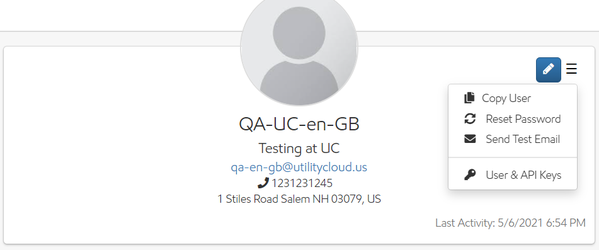
In the User Details of the user you'd like to copy, select Copy User from the upper-right dropdown list in the User Information panel.
-
-
Enter a new Full name and Email address, adjust any other details as necessary, then select Submit.
You won't be able to update the accounts or security roles when copying a user. Instead, finish creating the user and update from the User Details. After your new user has been created, you'll be taken to their User Details and a welcome email will be sent to their email address.
Security Rights Required: View Users; Copy Users
Importing users
You can create or edit a large number of users all at once by importing an .xlsx file. Both creating new users and editing existing ones use the same template. You can either download a fresh template or use an export of existing users. To use an export, see Exporting users.
Downloading a template
To download a blank template for a user import:
-
In the upper-right dropdown list of the User Search, select Import, then select Download a Blank Template.

-
After your template export is completed, you'll be notified either from the job processing panel or by email.
-
Job processing:
-
Select Complete once your job has completed.
-
If it isn't already, set Job Status to Complete.
-
On the job card, select Click Here To Download.
-
-
Email:
-
In your inbox, search for an email from postmaster@utilitycloud.us with the subject "User Template Export Complete".
-
Follow the link to download your export.
-
-
Security Rights Required: View Users; Export Users Blank Spreadsheet
Import fields
Your template downloads as an .xlsx file. The template includes the following fields:
-
Full Name (required): How your user appears in Utility Cloud to other users.
-
New Email (required for new users): The email address a new user will be set to, or the email address you'd like to change an existing user's email to.
-
Original Email (required for existing users): The email address of an already-existing user. On import, this column indicates you're updating an existing user.
-
Company: The company or organization your user is associated with.
-
Job Title: Your user's job title.
-
Is Active: Whether your user is active in Utility Cloud, indicated by 'Y' for yes and 'N' for no.
-
Preferred Site Language: The language Utility Cloud is translated into. Valid values include English, Spanish, Chinese, French, or German.
-
Primary Address Country Code (required): Your user's country, entered by using the ISO country code.
-
Primary Address (1, 2, 3, 4): Your user's address, entered in four separate columns. For a United States address, enter the information as follows:
-
Address 1: Street Address (123 Main St Suite 101)
-
Address 2: City (Boston)
-
Address 3: State (MA)
-
Address 4: ZIP Code (02110)
-
-
Phone: A phone number associated with your user so that other users can contact you outside of Utility Cloud.
-
Phone Extension: Your phone's extension, if it has one.
-
Fax: A fax number associated with your user.
-
Accounts (required): The names of each account your user is associated with. Separate each account with the
|pipe symbol. -
Roles (required): The name of each security role assigned to your user. Separate each role with the
|pipe symbol. -
Role Exceptions: The name of each security right assigned to your user as an exception. Separate each right with the
|pipe symbol, with a+prefix to indicate it's included and a-prefix to indicate it's revoked. -
Timezone: Your user's time zone.
-
Work order settings: Settings to determine when your user receives work order notifications. Each setting is enabled when the value is set to "True". These include:
-
Email user when work order is assigned to them
-
Email user when work order assigned to them is updated
-
Email user when work order assigned to them is completed
-
Email user when work order assigned to them is due
-
Email user when work order assigned to them is closed
-
-
Email Only User: Whether your user is configured for sign-in to Utility Cloud or set to only receive reports via email.
Importing your file
After you have either an updated export or a completed blank import template, you can import those users from the User Search. To import:
-
In the upper-right dropdown list of the User Search, select Import, then select Browse.

-
Select the file you're using to import, then select Upload.
-
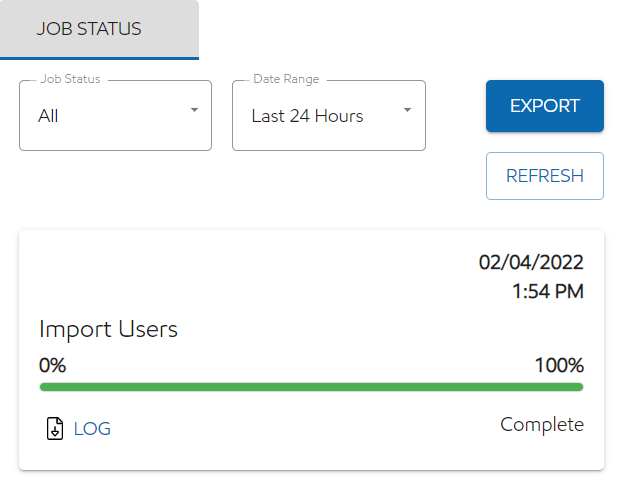
After your import is completed, you'll be notified either from the job processing panel or by email.
-
Job processing:
-
Select Complete once your job has completed.
-
If it isn't already, set Job Status to Complete.
-
-
Email:
-
In your inbox, search for an email from postmaster@utilitycloud.us with the subject "User Completed".
-
-
After your import is complete, new users will be available in the User Search and existing users will show their updates. Both will otherwise behave the same as if you'd created or edited them individually.
User imports can contain a maximum of 5,000 users. For more than 5,000 users, you'll need to import multiple files.
Security Rights Required: View Users; Import Users
Managing user access
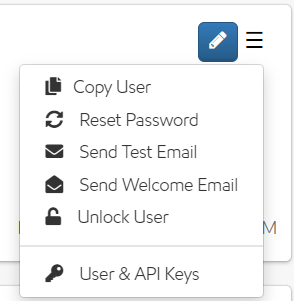
From the User Details page, you can manage the status of any user that needs their password reset, a verification or welcome email sent, or to be unlocked. You can also send a test email to verify that they're receiving emails from Utility Cloud properly.
Resetting passwords
You can reset a user's password at any time from their User Details. To reset a password:
-
From the User Details of any user, select the upper-right dropdown list in the User Information panel.
-
Select Reset Password.
A password reset email will be sent to the user. They can follow the link in the email to set a new password.
Security Rights Required: Reset User Password
Sending a test email
If a user doesn't appear to be receiving emails from Utility Cloud, you can send a test email. To send a test email:
-
From the User Details of any user, select the upper-right dropdown list in the User Information panel.
-
Select Send Test Email.
A test email will be sent to the user. If they receive it, there may be an issue with their configuration or another setting in Utility Cloud. If they don't receive it, their email client may be blocking emails from Utility Cloud. For more information, see Unblock Emails.
Security Rights Required: View Users
Welcome email
If a user hasn't signed in to Utility Cloud after creation and they no longer have their welcome email, you can resend a new one:
-
From the User Details of a new unverified user, select the upper-right dropdown list in the User Information panel.
-
Select Send Welcome Email.
A new welcome email will be sent to the user and they'll be able to sign in for the first time through the normal process described in Signing in for the first time.
Security Rights Required: View Users
Verification email
If a user's email address has changed from the one set on user creation, that user will need to verify the new address from a verification email. If they haven't received or no longer have their verification email, you can send a new one:
-
From the User Details of an unverified user, select the upper-right dropdown list in the User Information panel.
-
Select Send Verification Email.
A verification email will be sent to the user. They can follow the link in the email to verify their new email address.
Security Rights Required: View Users
Unlocking users
If a user hasn't signed in within 30 days of being created or hasn't signed in for over 365 days, they are automatically deactivated and locked out. A user is also locked out if they enter a wrong password five consecutive times. To unlock a user:
-
From the User Details of a locked user, select the upper-right dropdown list in the User Information panel.
-
Select Unlock User.
That user will now be unlocked and able to sign in again. If a user was locked out from entering a wrong password, they may also need a password reset before attempting to sign in again.
Security Rights Required: Can Unlock Users
Anonymizing users
Anonymizing a user removes all personally identifiable information (PII) from their profile and the audit trail without deleting the user itself, such as their name, email address, and physical address. That user is also deactivated if they are not already inactive.
Anonymized users are hidden from your User Search results and exports, and anywhere you’d see that user’s name or email, you instead see User {UserId} and {UserId}@historic.ucld.us respectively. If you navigate directly to an anonymized user's User Details, an Anonymized status indicator appears in the upper-left of the User Information panel, like with inactive or locked out users. Anonymized users cannot be edited.
Anonymizing a user is intended to remove their personally identifiable information but can also be useful for freeing up an email address associated with a user in a bad state, such as when a new user needs to be created with the same email address.
Anonymizing a user is not reversible.
To anonymize a user:
-
From the User Details of the user you'd like to anonymize, select the upper-right dropdown list in the User Information panel.
-
Select Anonymize User.
-
Select Yes to confirm.
You can only anonymize users with a restriction level equal to or higher than your own. For more information on restriction levels, see Security roles.
Security Rights Required: View Users; Anonymize Users