
Key points to Excel Add-in
The Excel Add-in allows you to connect your Excel workbooks to Utility Cloud allowing you to:
-
Consume historical work data.
-
Download and update assets in Utility Cloud from directly within Excel.
Quick Steps to Install
-
Click here to download the Excel add-in file "setup.exe" (note the download location).
-
Locate the downloaded "setup.exe" file and double open to launch the installer.
-
Follow prompts to install.
-
Open Excel and select the new Utility Cloud ribbon.
-
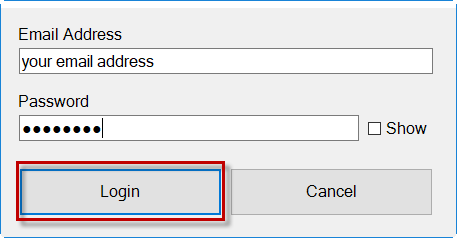
Select Login.
-
Enter the login information and select Login.

Logging in with your email address will log you into our main production environment ("https://ucld.us/"). If you configured to use on of our single tenant environments or a testing environment, simply place the subdomain name in front of your email address separated with a pipe character like this:
Email address examples:
myemail@mycompany.com (this will login to https://ucld.us/)
demo|myemail@mycompany.com (this will login to the demo environment https://demo.ucld.us/) for more information on this environment please read the demo environment page here.
acc|myemail@mycompany.com (this will login to the acceptance environment https://acc.ucld.us/)
de|myemail@mycompany.com (this will login to the de environment https://de.ucld.us/)
your-dedicated-environment|myemail@mycompany.com (this will login to the dedicated environment https://your-dedicated-environment.ucld.us/)
Security Rights: Based on the following rights you will see additional options in the ribbon:
-
Access Excel Add-In:
allows you to log in to the Excel Add-in.
-
Access Excel Assets Group: allows you to retrieve a list of assets through the add-in.
-
Access Excel Workflow Reports Group
-
Can Submit Asset From Excel:
allows you to create or edit assets through the Excel add-in.
Watch Video Overview
Click here to watch (2:24)
Assets Group
The Excel add-in offers a powerful solution that allows users to review asset data, make changes to assets and their attributes and submit the changes directly to Utility Cloud. All updates are validated to ensure changes are valid prior to submitting them to Utility Cloud. This makes mass updates and cleanup projects easy and effortless.
Quick Steps to Get Assets
Users can export already created assets from Utility Cloud into an excel file for easy viewing and updating.
Select Get Assets.
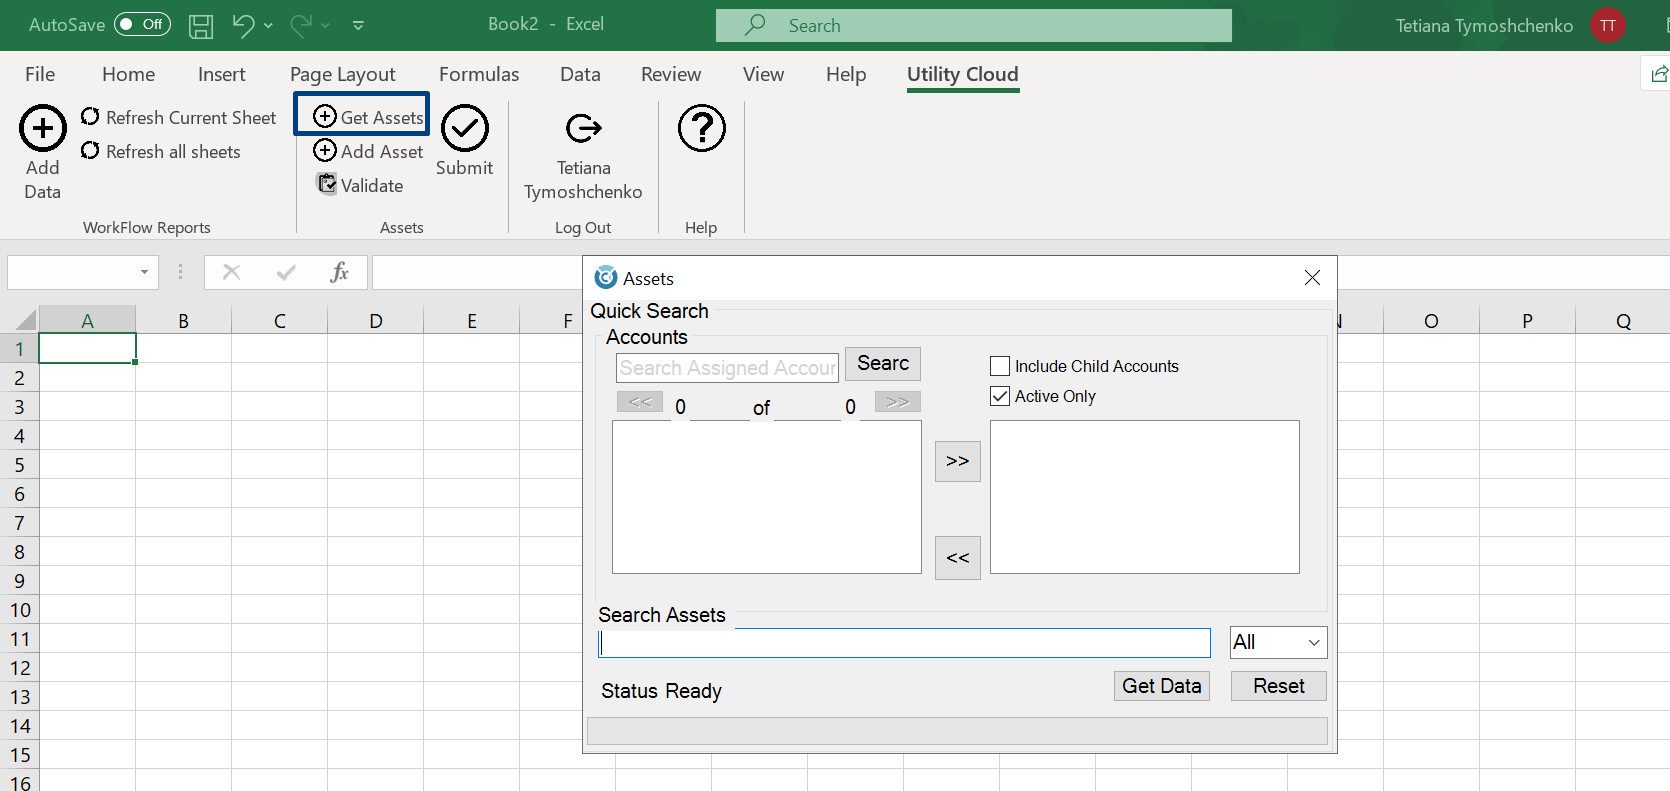
Account Picker will be opened where users can perform Search and Select any amount of the accounts they have access to.
With Billing Account Admin security right assigned users will be able to access any accounts within their billing account, whether or not they are assigned to the accounts.
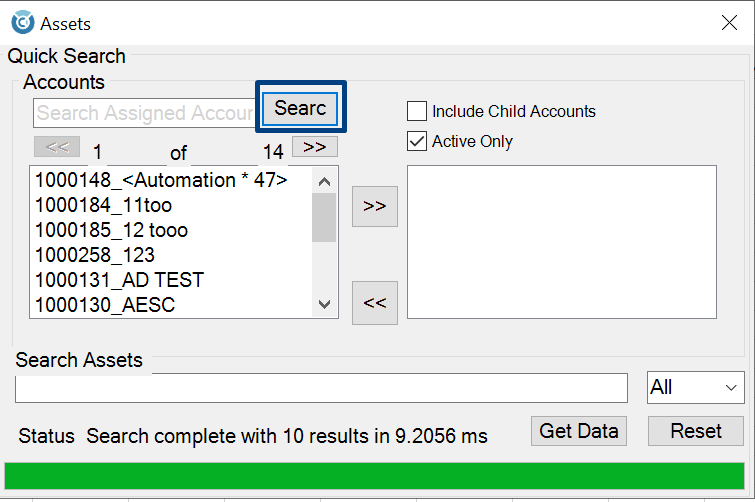
By simply selecting Search button with an empty Search Bar the list of all accounts user has access to will be shown in Results Returned on the left:
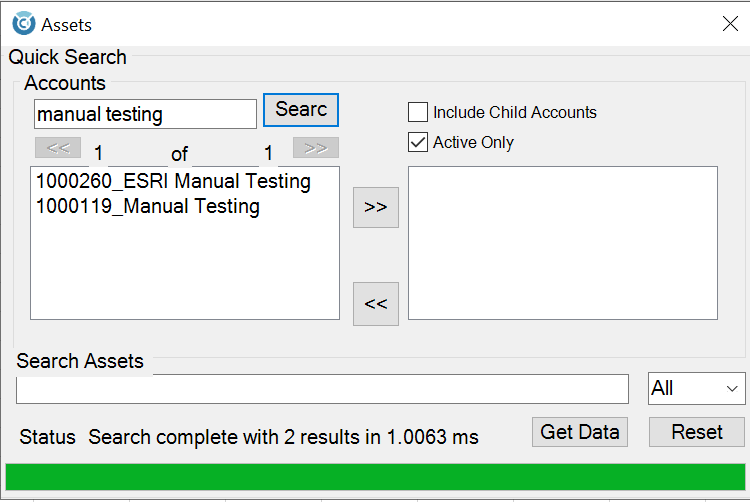
Perform Search for any existing account/accounts and selecting the Search button. The account or the list of accounts that match the search will be shown on the left.
In order to Select the needed account/accounts from Search Results simply selecting the needed account/accounts and selecting the Double Right Arrows button:

Then select the Get Data button.
If you do not have any data on your current excel spreadsheet then the list of the assets from the selected account/accounts will be downloaded to the current excel spreadsheet.
If you have any data on your excel spreadsheet then y ou will be prompted if you want to open a new sheet to place this data. If No is selected, the current sheet will be cleared and replaced with the requested data. Otherwise, a new sheet will be added to the Excel File and the list
of assets from the selected account/accounts will be downloaded to the new sheet:
Required: Perform Search by keyword and select at least one account or press on Search button with empty Search Bar to get all accounts listed to which you have access to.
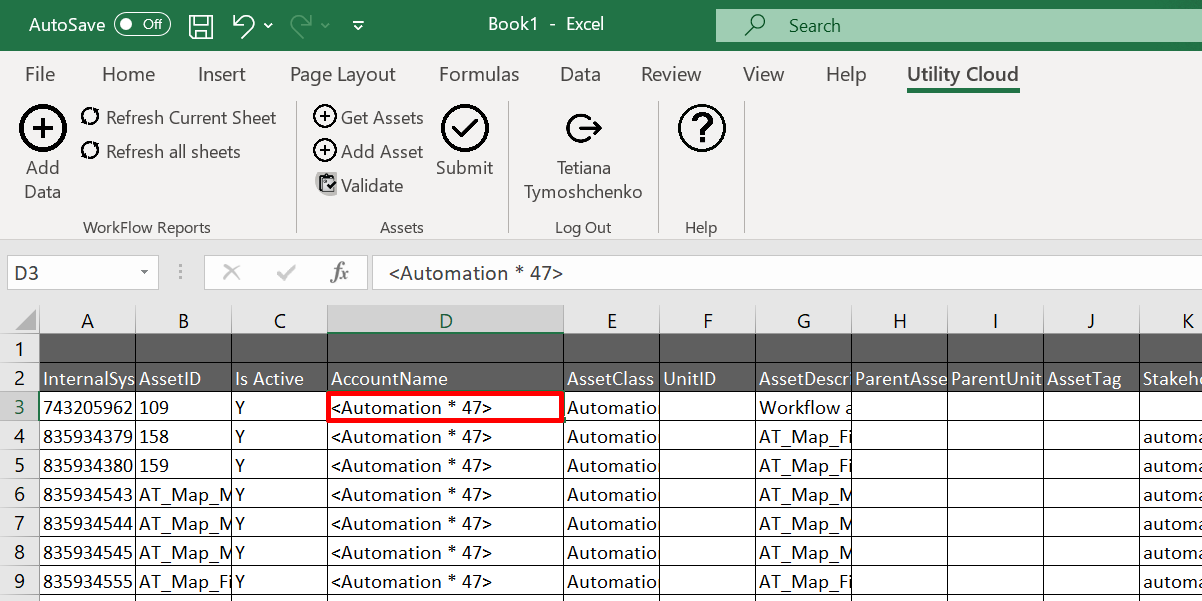
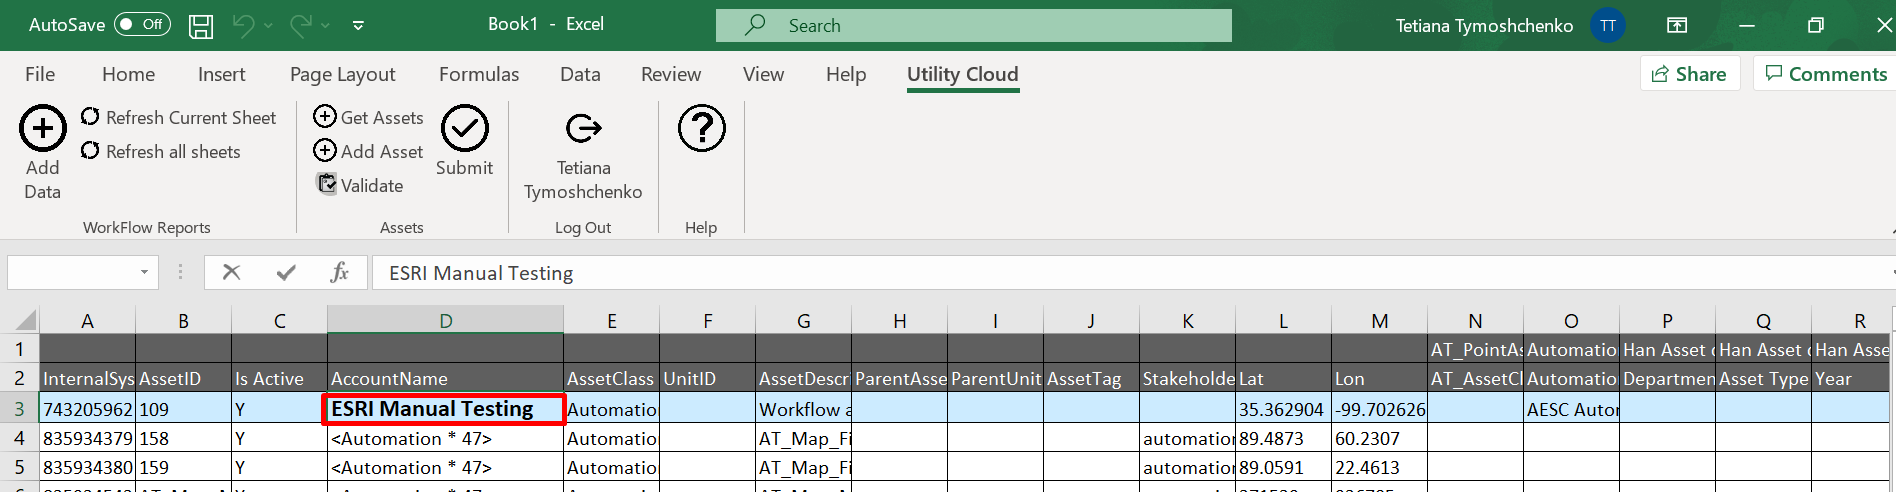
Users can easily change the Account of any of the retrieved assets. In order to do this, double click on the Account Name field under any of the retrieved assets:
The Account Picker is opened with the current asset's Account Name listed in Search Bar:
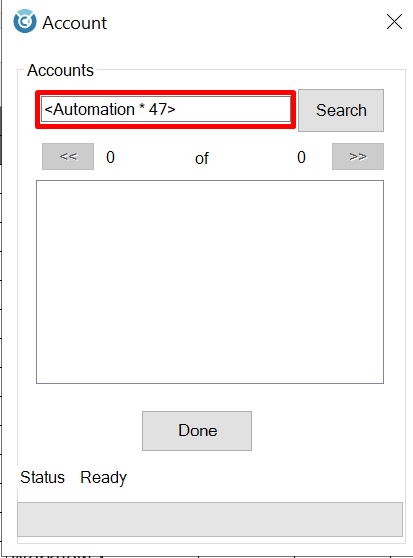
In order to change the Account Name of the selected asset, you need to erase the current Account Name and enter the keyword/keywords of the needed account into Search Bar and select Search button.
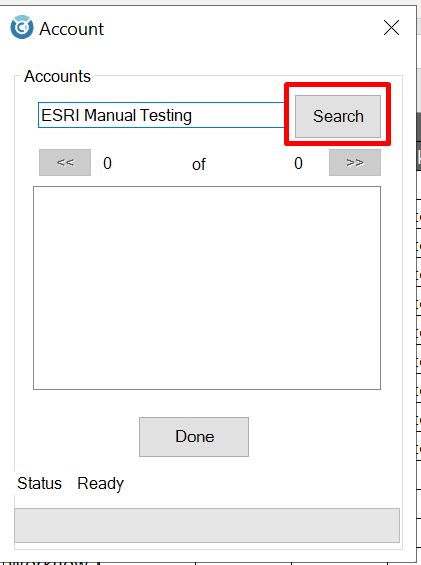
The specified account is shown in Results Returned. Select the needed account from the Search Results and select the Done button:
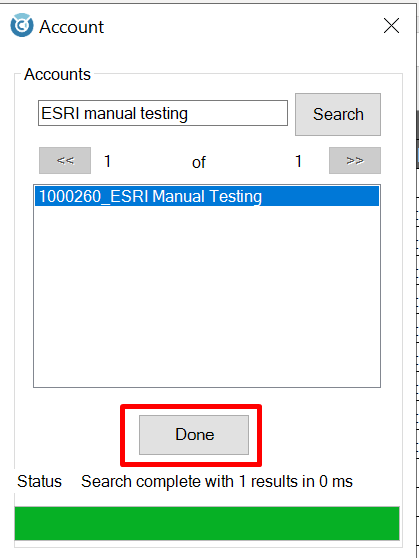
The Account Name of the selected asset from retrieved list is automatically changed to the one specified in Search Results:
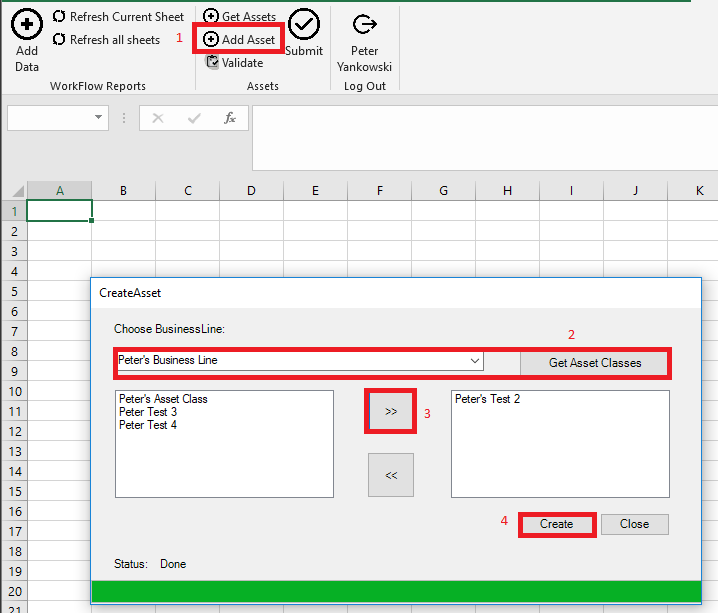
Quick Steps to Add Assets
Users can create new assets using the Excel Add-in
-
Select Add Assets.
-
This will add a new sheet to the Excel File.
-
Select a business line then Select Get Asset Classes.
-
Select the desired asset classes then select the >>.
-
Select Create.
-
Fill in Data for the new assets.
-
Select Submit to submit your changes.
Quick Steps to Submitting Assets
Users can validate and submit new and updated assets directly into Utility Cloud using the Excel Add-in. This can only be done on a sheet-by-sheet basis.
Import or create new assets using the steps above.
Make changes to the assets.
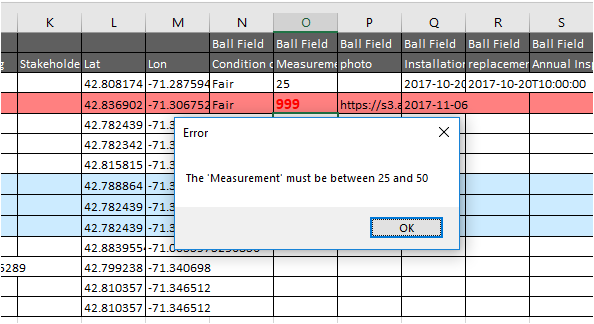
If a change fails validation it will immediately appear red, the specific cell will be bold and a message will appear notifying of the incorrect data. Make the correction and the row will turn blue.
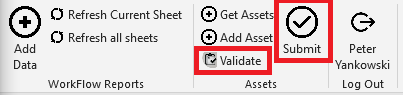
Select Validate.
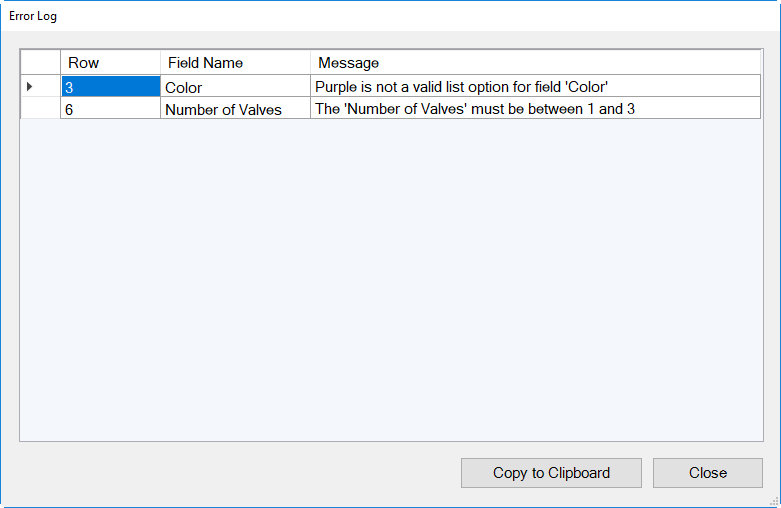
If any row fails validation, it will appear red and the specific cell will be bold. An error log will appear with a list of all rows that did not pass validation and why. These can be copied to a clipboard if necessary. Close the dialog box and correct the errors.
If a row passes validation it will appear blue.
Select Submit to upload changes into Utility Cloud.
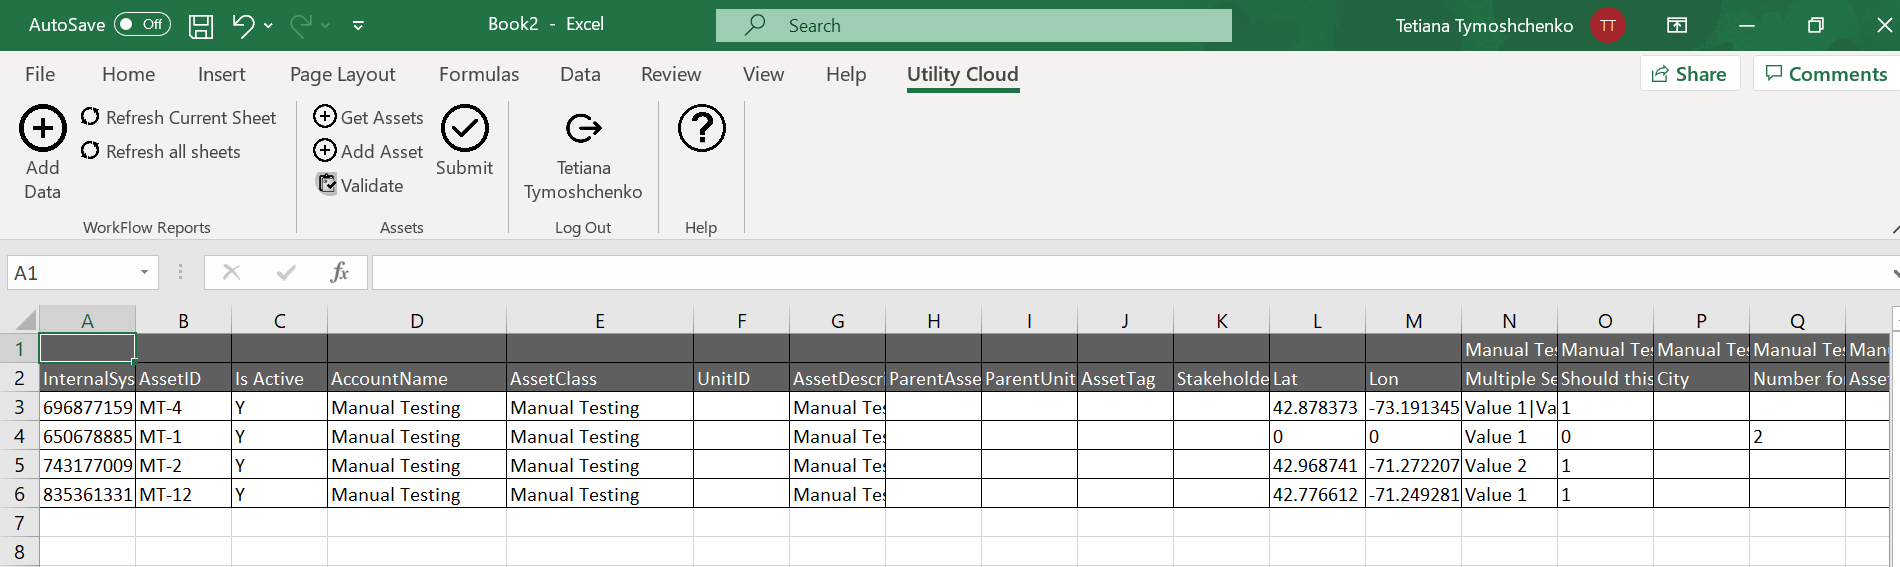
New assets added in under a set of pre-existing assets will be added as inactive if they are set as active.
Account Name was updated – the field displays in BOLD and in BLUE; indicating the change passed all validations

Column ‘O” was edited and failed validation as the number needs to be between 25 and 50. The field and row are highlighted in red to indicate it is invalid.
A user may remove this row from the excel sheet and submit the remaining rows or correct the invalid entry and re-submit.
Workflow Group
Users can pull information out of Utility Cloud to view and update work and/or assets with the excel add-in. Updates can be made to assets and validated in the excel add-in, then uploaded to Utility Cloud.
Quick Steps to Add Data from Workflow reports
Users can retrieve workflow reports from Utility Cloud for easy viewing - to pull information from Utility Cloud into an excel file for simplified data recall. The criteria can be limited by asset, asset class, workflow report name, and account.
-
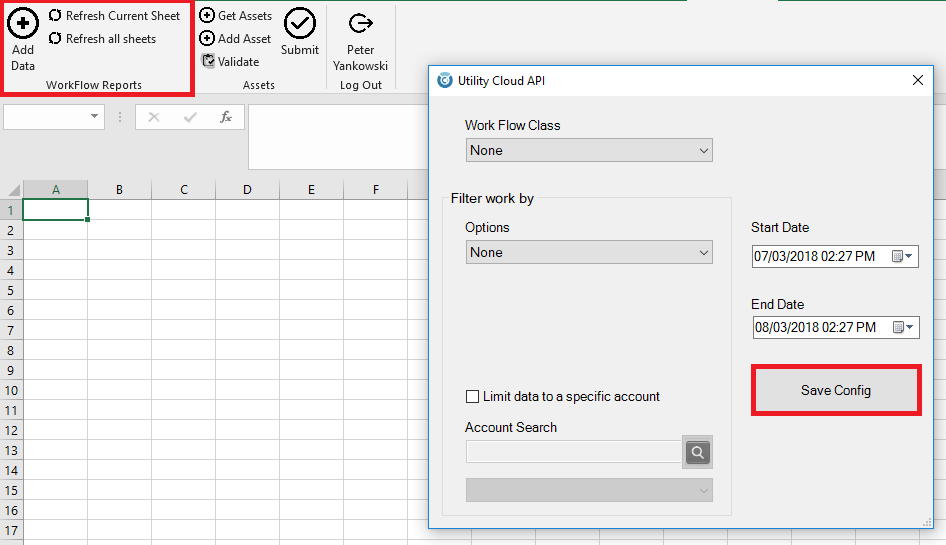
Select Add Data.
-
You will be prompted if you want to open a new sheet to place this data. If No is selected, the current sheet will be cleared and replaced with the requested data. Otherwise, a new sheet will be added to the Excel File.
-
Select a Start and End Date.
-
Users can search for data via a specific workflow.
Or
-
Users can search by Asset, Asset Class, or Workflow Report.
-
All data can be limited to a specific Account, Asset Class, or Asset .
-
Select Save Config to run the search and return the data.
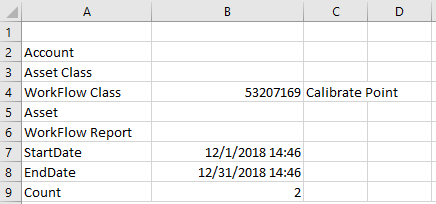
The top of the resulting sheet contains the configuration selected via the dialog box. This workbook can be saved for future use without being required to Get Data again. Simply, change the Start and End Dates or enter a different Account ID, Asset Class ID, Asset ID, Workflow ID or a specific Workflow Report ID.
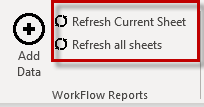
Use the Refresh Current/All Sheets Buttons to refresh the data on the current sheet or all sheets.
Quick Steps to Logging Out
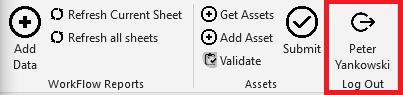
Use the button with the user's name to log out.
If Utility Cloud Ribbon is Missing
Select File; Then Options. This will open up the Excel Options. Once there you want to select Add-ins and make sure Utility Cloud is an Active Add-In. See below for an example.
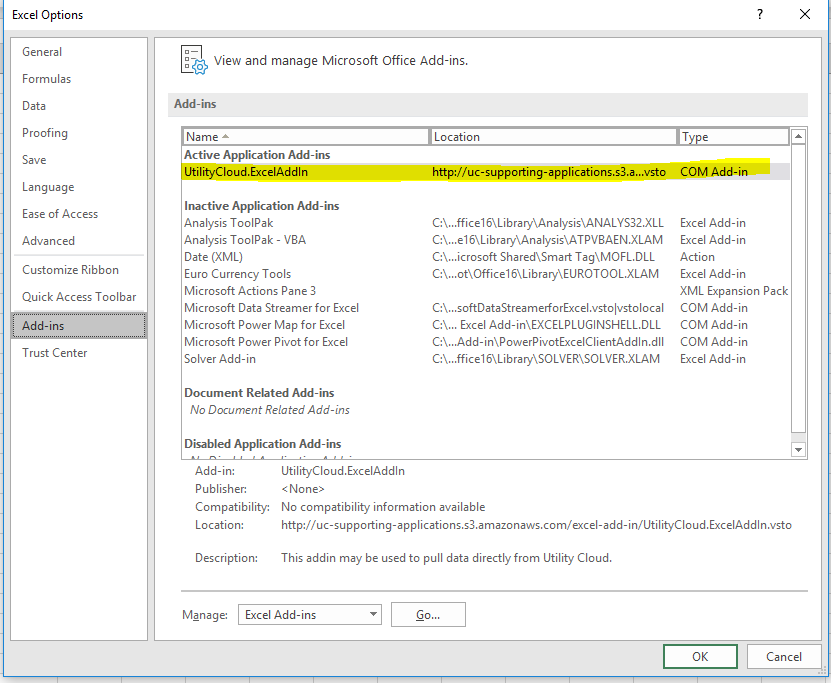
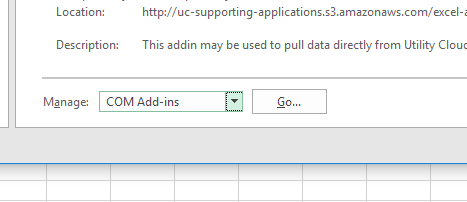
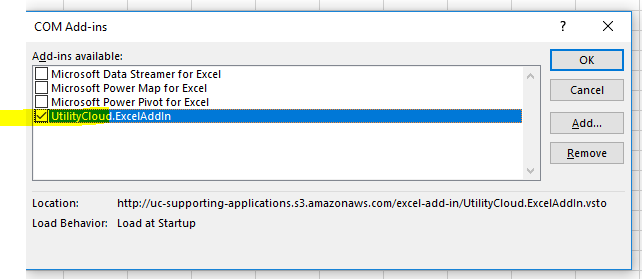
If there is nothing under Active Application Add-Ins, check under Inactive Add-Ins to see if it is there, if not you will need to reinstall. If you do see it under inactive, select Manage at the bottom and select COM Add-Ins. Make sure Utility Cloud is checked. If it is not checked, check it, otherwise, if it is missing entirely, you will need to reinstall the Utility Cloud Ribbon.
Store the Add-in in a Trusted Location
The great solution to the missing ribbon is to store the add-in file in a Trusted Location. A Trusted Location is a folder on your hard drive or server that has been added to the Trusted Locations list in Excel.
You can either move the add-in file to a trusted location or add the add-in file's location to the list of trusted locations.
How to add a folder to the Trusted Locations list in Excel:
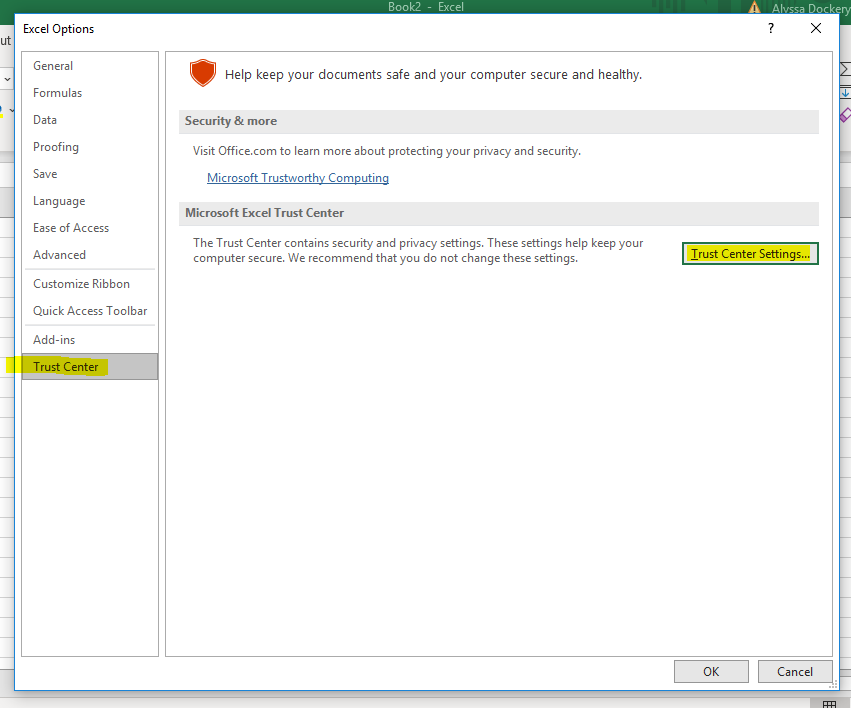
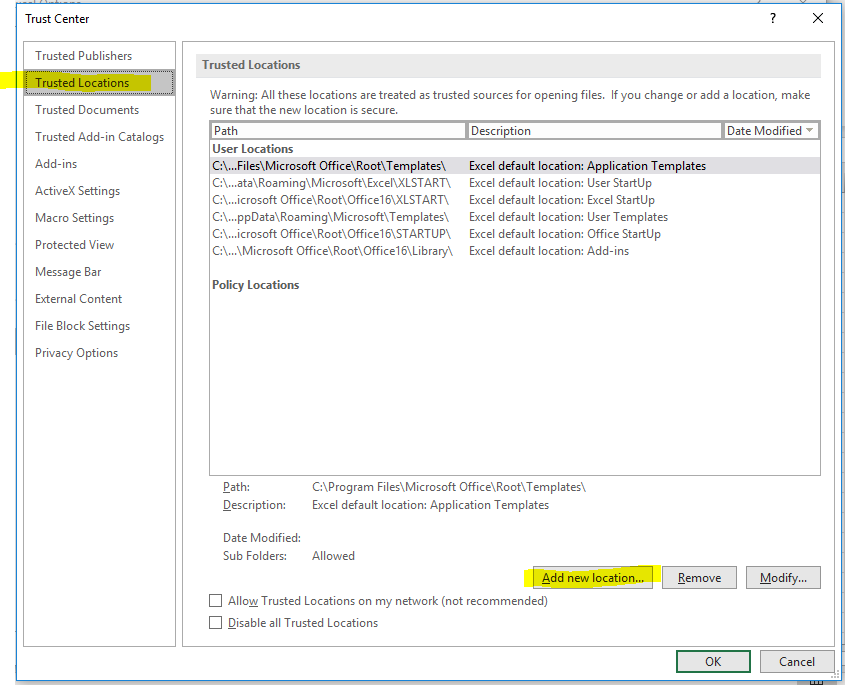
Open the Trusted Locations menu. File>Options>Trust Center>Trust Center Settings>Trusted Locations.
Press the Add new location.
Select the Browse button.
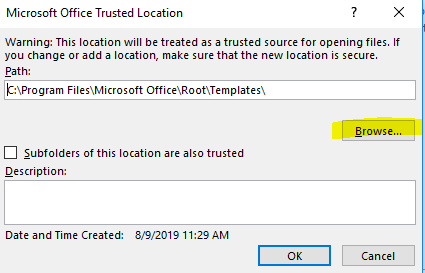
Navigate to the folder that contains your add-in file and press OK.
Press OK on the Trust Center Window.
Close Excel and re-open.
The Default Add-Ins Folder Needs to be Trusted
The following path is the default location where add-ins are stored on the computer:
-
C:\Users\your_username\AppData\Roaming\Microsoft\AddIns
-
C:\Users\your_username\AppData\Local
NOTE: Please be sure to check the Subfolders check box.
If you store add-ins in this default AddIns folder then you will need to add it to the Trusted Locations list. For most users, it is not trusted by default.
Requirements
Windows-based Microsoft Excel 2007 or greater
Note: Microsoft Excel add-in on Apple devices is not supported
https://www.excelcampus.com/vba/add-in-ribbon-disappears/
Related articles