
Key Points to Using Letters
-
Create custom letters using real-time data recorded through workflow reports.
-
Keep customer up to date with their inspection results.
-
Reduce the amount of time spent producing letters by more than 70%.
Detailed Description on Letters
Sending out inspection notices is seamless with Utility Cloud’s letter feature. Use real-time data from inspections to populate custom emails to send out to your customers.
Utility Cloud’s letter feature allows the user to create a custom template that can be used to notify customers of inspection results. Not only does the letter feature reduce the amount of time processing and sending out letters by more than 70%, it also ensures all inspections are followed up on using the results from the field crews inspections. Some prime examples of uses for the letter feature are; fog inspection results, septic inspections results, and smoke testing results.
Create a Letter
Quick Steps to Create a Letter
-
Select the Letter tile from the Landing Page or from the left navigation menu.
-
Select the Create icon.
-
Fill in the letter name and description on the Details tab.
-
Select the work queue that is being referenced for the letters.
-
Once the information has been entered on the Details tab, select the Letter tab.
-
Use the text box area to format the letter. Drag and drop the Common and Attribute values to create customized information on each letter.
-
Select Save at the bottom of the screen to save the letter as a template, or select print to print the letters.
Security Rights Required: Can View Letters; Can Create Letters; Can Edit Letters; Can Print Letters
Detailed Steps to Create a Letter
The letter feature is designed to allow users the ability to print letters based on information that is recorded on an asset’s attributes and completed workflows. Work queues need to be set up prior to creating a letter. More information on creating a work queue can be found here.
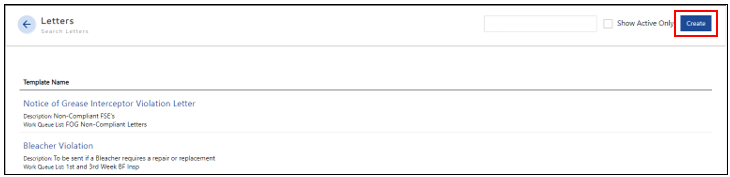
Select the Letter Tile
Select the Letter tile from the Landing Page or from the left navigation menu. This page stores all letter templates created and allows users the option to create new letters.
Select the Create Icon
Select the Create button to create a new letter.
Enter the Information on the Details Tab
Complete the following information on the Details tab:
-
Name the letter
-
Enter the description of the letter
-
Select the Work Queue that contains the data that needs to be included in the letter. For example; if a letter needed to be sent to customers informing them of their FOG Inspection results, the FOG Inspection work queue would need to be selected. This work queue would contain information on each of the FOG assets as well as the inspection results.
Select the Letter Tab
Once the information has been entered on the Details tab select the Letter tab to create the letter format. The text box area is similar to the format of a word document. Use the tools in the text are to customize the letter. Users can also use the drag and drop function to add attribute and common information to the letter. Refer to the features below to assist with customizing your letters.
Dynamic Letter Variable - Common
These are common values that can be used to assist with customizing letters. Simply select the value and drag it into the text box of the letter. The common values that can be used in the letter feature are:
-
Current Date
-
Asset Class Name
-
Asset Description
-
Asset ID
-
Workflow Title
Dynamic Letter Variable - Attributes
These values are derived from the asset attributes. Simply select the value and drag it into the text box of the letter.
Adding a Photo or Company Logo
The user has the ability to add a logo or image to the letter. The image being used has to be copied from a website. Simply find the image that needs to be added to the letter, right click, and select the option Copy Link Address. Once the image address has been copied select the image option in the text box area in the letter that is being created. Paste the link and save the changes. The image is resizable and can be customized to appear anywhere on the letter.
Print the Letter
Once the letter format has been created the user will be able to print the letters. A preview option will appear if the user would like to view the letters prior to printing.
Save the Letter
The user can select Save to access the letter at a later time. It will be stored in the Letters Tile as a template.
Related articles