
OPC Interface
Applies to both “Machine Connect” (on-prem) and “Machine Connect Online” (cloud-based).
How to configure integration with OPC servers
Navigate to Asset Class
Add following fields to Asset Class
Title | Key | Type | Details |
|---|---|---|---|
MC_INTTYPE | MC_INTTYPE | Text | |
OPC_SERVER_URL | OPC_SERVER_URL | Text | |
OPC_USERNAME | OPC_USERNAME | Text | |
OPC_PASSWORD | OPC_PASSWORD | Text | |
OPC_LAMBDA | OPC_LAMBDA | Text | Add this field if you are using Machine Connect Online |
3. Navigate to Asset, click “Edit” button and fill added properties by credentials from OPC UA server. For example:
Field name | Field value |
|---|---|
MC_INTTYPE | OPC |
OPC_SERVER_URL | opc.tcp://opc.server.com:4840 |
OPC_USERNAME | Username |
OPC_PASSWORD | Password |
OPC_LAMBDA | ENABLED |
Note: “MC_INTTYPE” should be “OPC” to make Asset visible for OPC synchronization
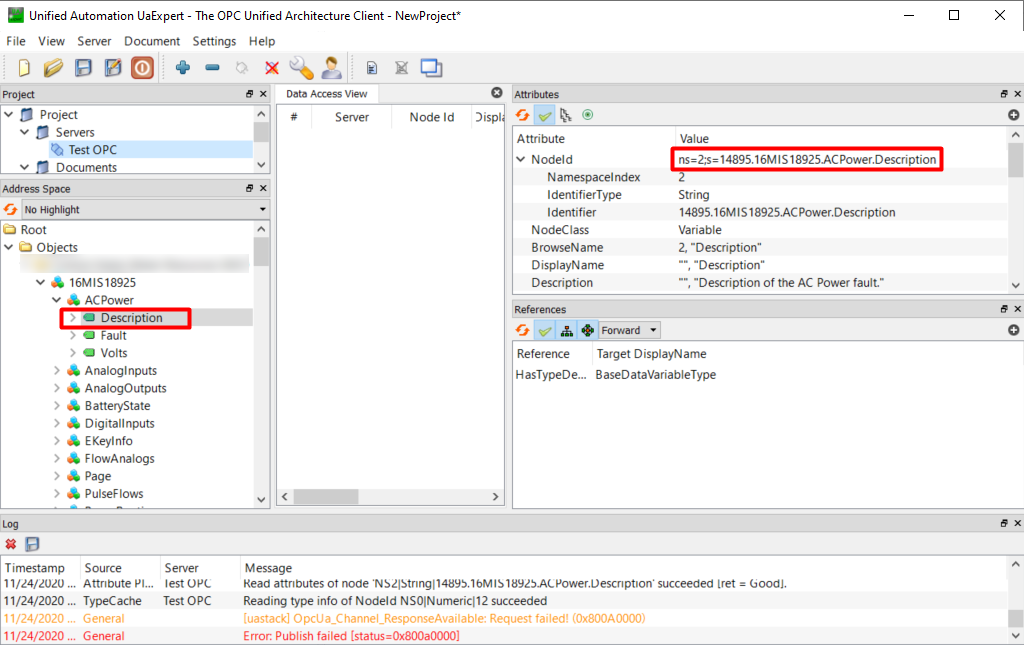
4. Open OPC UA Desktop Client. For example UAExpert and copy NodeId to Workflow Class:

Note: Enable "Machine Connected" option for fields that need to be visible for "Machine Connect":

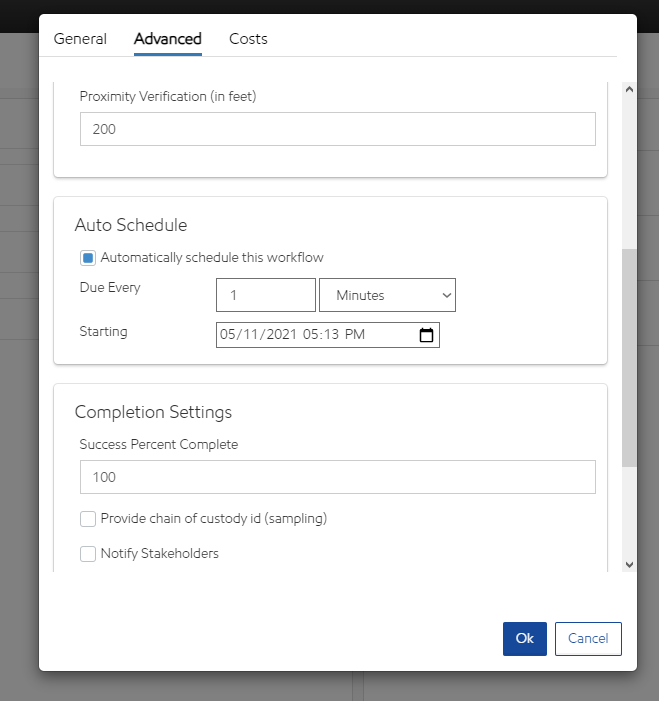
Also, Auto Schedule section needs to be configured on the Workflow:
5. If you use “Machine Connect” (on-prem), you can click on “Force Workflow Capture” button and make sure that workflow report is created with data from OPC UA server. If you use “Machine Connect Online” (cloud-based), you will need to wait some time for next workflow capture.